How to record your iPhone screen on a Mac
Four ways to record an iPhone screen on a Mac, how each handles sound and narration, Apple's App Store preview specs, and how to turn the take into a narrated demo.
 Berkay Akpolat12 min read
To record your iPhone screen on a Mac, connect it with a USB cable, open QuickTime Player, choose File > New Movie Recording, click the arrow next to Record, pick your iPhone as the camera and click Record. You can also record on the iPhone and AirDrop the file or, outside the EU, record the iPhone Mirroring window on macOS Sequoia or later (Apple doesn't document this; test it first).
Updated 2026-11-04
In this guide
- 4 ways to record your iPhone screen on a Mac
- How to record your iPhone screen with QuickTime
- Can you record the iPhone Mirroring window?
- Record on the iPhone, then AirDrop it to your Mac
- How to add a voice-over and captions to an iPhone screen recording
- App Store app preview specs
- Turn the recording into a narrated app demo with Clevera
- FAQ
4 ways to record your iPhone screen on a Mac
The four ways differ mostly in sound, narration and what you get at the end.
| Method | Connection | iPhone sound | Your voice | What you get | Main limits |
|---|---|---|---|---|---|
| QuickTime Player | USB cable | Yes, if you pick the iPhone as the microphone | Only if you pick the Mac's mic instead (one mic at a time) | A .mov file on your Mac | Basic edits only (such as trim); narration only live |
| iPhone Mirroring + a screen recorder | Wireless (same Apple Account) | Plays through the Mac; recordable as system audio from macOS 27 | Mac microphone | A recording of the mirroring window | macOS 15+ and iOS 18+; not in the EU; recording it is undocumented, so test first |
| Control Center on the iPhone | None, then AirDrop | Yes | iPhone mic (touch and hold Record) | A video in Photos | Can't record while AirPlay screen mirroring; some apps block recording |
| Clevera for Mac | USB cable | Yes, always | Mac microphone at the same time | A narrated video, captions and a step-by-step article in your Clevera workspace | Mac only; uploads to the cloud; no tap capture, camera bubble or portrait zooms; MP4 download from Starter (Free shares by link) |
Pick QuickTime for a quick raw clip, Control Center away from your Mac, iPhone Mirroring without a cable, and a tool like Clevera for a narrated demo or help article. QuickTime, Control Center and Clevera work the same way for an iPad; iPhone Mirroring is for iPhone only.
iOS accounted for 51.96% of mobile web page views in the US in October 2026, and mobile devices for 59.9% of all web page views worldwide (StatCounter, US mobile OS share; platform share), so a walkthrough of a mobile app often has to show the iPhone itself, not a desktop browser.
How to record your iPhone screen with QuickTime
Based on Apple's QuickTime Player guide:
- Connect the iPhone to your Mac with a cable. Unlock it, and if it asks, tap Trust and enter your passcode.
- Open QuickTime Player and choose File > New Movie Recording.
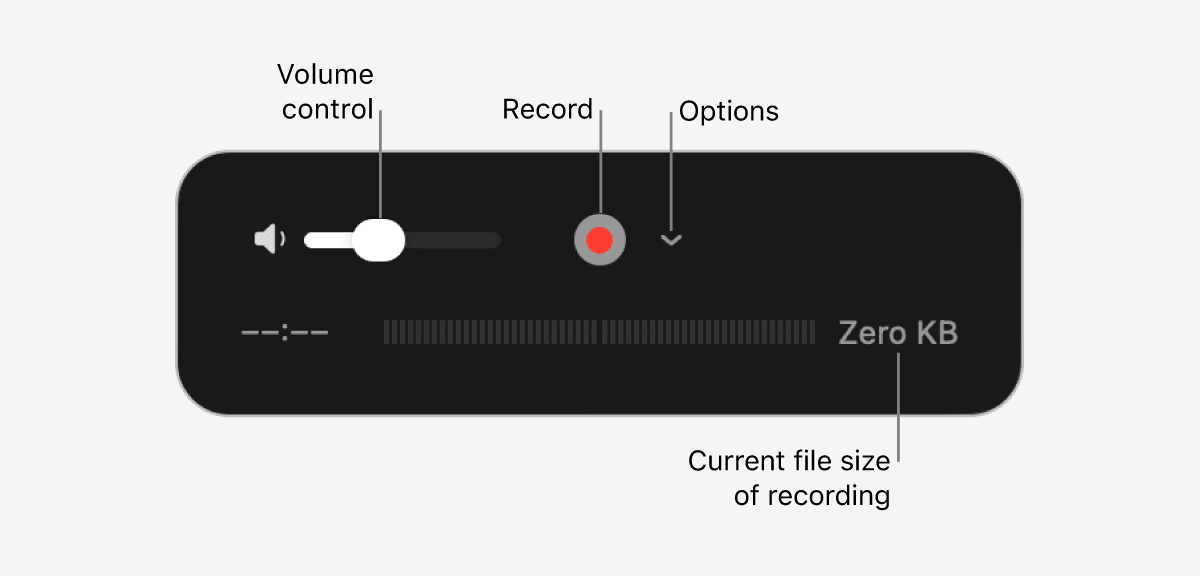
- Click the arrow next to the Record button. Under Camera, choose your iPhone. The window now shows the iPhone's screen.
- Under Microphone, choose the iPhone to record its sound, or your Mac's microphone to record your voice.
- Under Quality, keep High (H.264 video and AAC audio). Maximum uses Linear PCM audio and makes much larger files.
- Click Record, use the iPhone, then click Stop. Choose File > Save.
Need an MP4 instead of a .mov? Use the MOV to MP4 converter.
The audio catch. QuickTime records from one microphone. Pick the iPhone and you get the app's sounds, not your voice; pick your Mac's mic and you get the reverse. For both, record the screen with iPhone sound and add your narration afterwards (see How to add a voice-over and captions).
Before you record, turn on Do Not Disturb, keep the iPhone unlocked, hold it the way you want the video, and use test data. Afterwards, Edit > Trim cuts the start and end (Apple).
Can you record the iPhone Mirroring window?
iPhone Mirroring lets you use your iPhone from a window on your Mac, without a cable. Apple's requirements, from its iPhone Mirroring support page:
- macOS Sequoia 15 or later, on a Mac with Apple silicon or the T2 chip, and iOS 18 or later on the iPhone.
- The same Apple Account on both, with two-factor authentication. Bluetooth and Wi-Fi on.
- The iPhone stays locked and nearby; the Mac isn't using AirPlay, Sidecar or internet sharing.
- It is currently unavailable in the European Union.
To record it:
- Open iPhone Mirroring from the Dock or Applications and unlock with your iPhone passcode when asked.
- Press Shift-Command-5 to open the Screenshot app. Choose Record Selected Window (macOS Tahoe 26 or later) or Record Selected Portion and frame the mirroring window.
- Click Options. Choose a microphone for your voice. On macOS 27 or later, choose Include System Audio to record the iPhone's sound, which plays through your Mac while mirroring.
- Click Record, work in the mirroring window, then click Stop in the menu bar.
Steps 2–3 follow Apple's Mac screen recording article. Before you rely on it:
- Apple doesn't say whether the mirroring window can be recorded. Screen recorders such as Screen Studio document recording it as a window. Do a 10-second test on your Mac before a real take.
- The iPhone's camera and microphone aren't available in iPhone Mirroring, and streaming apps may refuse to play their video.
- AirPlay screen mirroring to a Mac is a different feature. Tella's help center says AirPlay mirroring records as a black rectangle.
Record on the iPhone, then AirDrop it to your Mac
The iPhone's own recorder needs no Mac and records the phone's sound. Apple's steps (Record the screen on your iPhone):
- Swipe down from the top-right corner to open Control Center.
- To include your voice, touch and hold the gray Record button and tap Microphone.
- Tap Record, wait for the countdown and leave Control Center.
- To stop, tap the red indicator at the top and tap Stop.
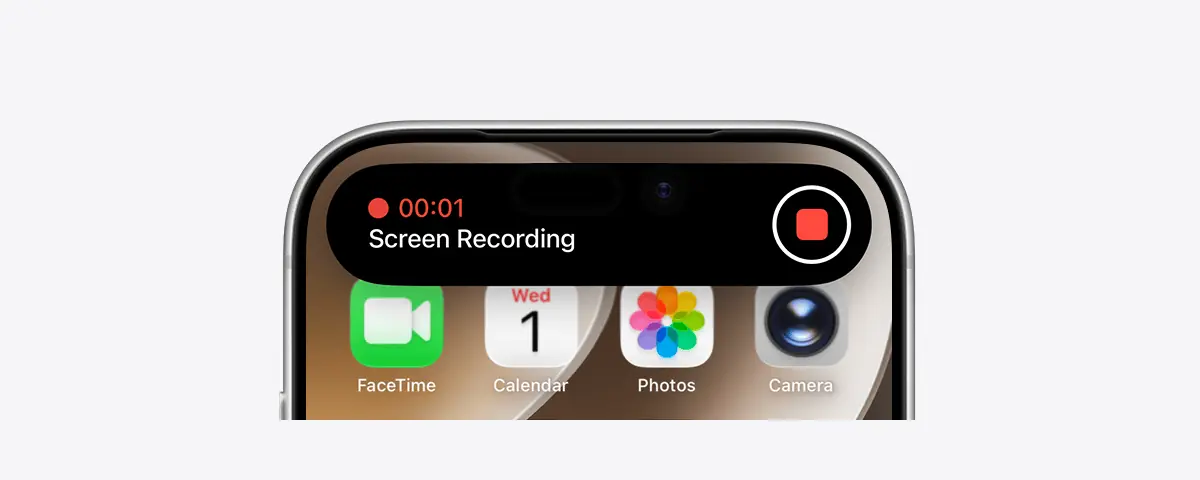
The video lands in Photos. Send it to your Mac with AirDrop (Share > AirDrop > your Mac) and it arrives in Downloads.
Apple notes that some apps block recording, and you can't record while AirPlay screen mirroring.
How to add a voice-over and captions to an iPhone screen recording
Three ways to add the explanation:
- Talk while you record. Fine for a quick answer, but see the QuickTime audio catch above.
- Record the narration afterwards. Import the clip into an editor with a voice-over track (iMovie has one), and read a short script against the picture (how to plan and script a software tutorial video).
- Generate the narration. AI tools can write a script from what happens on screen and read it in a synthetic voice, if you'd rather not use your own; see how to make tutorial videos without being on camera.
Add captions either way, for viewers who watch muted or are deaf or hard of hearing. Keep caption lines short on portrait video, or they cover the UI.
App Store app preview specs
The main rules from Apple's App preview specifications (as of 2026-11-04):
| Requirement | App preview spec |
|---|---|
| Length | 15 to 30 seconds |
| Number | Up to 3 per device size and language |
| File | .mov, .m4v or .mp4 (H.264), or .mov (ProRes 422 HQ); 500 MB max |
| Frame rate | 30 fps max |
| Audio | Stereo, 256 kbps AAC, 44.1 or 48 kHz |
| Resolution, current iPhones (Face ID models) | 886 × 1920 portrait or 1920 × 886 landscape |
| Resolution, iPad (11" and 13") | 1200 × 1600 or 1600 × 1200 |
Check your export's frame rate and size with the video metadata viewer, and cut it to 15–30 seconds with the video trimmer.
Three things that trip people up:
- Resolution is not the device resolution. An iPhone records at its own screen size (for example 1179 × 2556); App Store Connect wants 886 × 1920 for that group, so scale it first.
- Frame rate. Many editors export at 60 fps; re-encode to 30 fps.
- Only the app itself. Apple's App Review Guidelines (2.3.4) say previews may only use screen captures of the app. Narration and video or text overlays are allowed, so leave out device frames and styled backgrounds.
Turn the recording into a narrated app demo with Clevera
Clevera is an AI platform that turns a screen recording into a narrated how-to video, a step-by-step help article and a page on your hosted help center, in 74 languages. Its Mac app records a connected iPhone or iPad directly.
How it works (help: Record an iPhone or iPad):
- Download Clevera for Mac (macOS 12.3 or later), sign in, connect the iPhone with a cable, unlock it and tap Trust. Clevera asks for Camera permission, because macOS treats the iPhone as a camera.
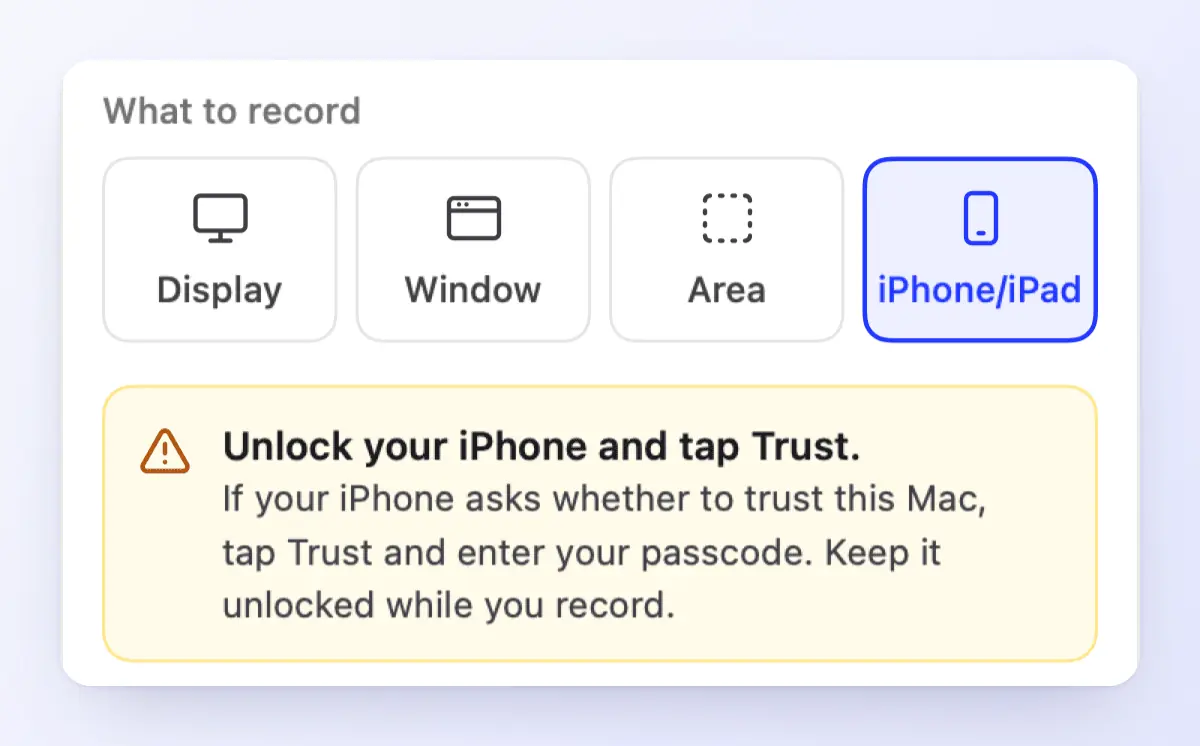
- In the recorder, click iPhone/iPad (⌘4). Choose your Mac's microphone if you want to talk. The iPhone's own sound is always recorded, so you get both.
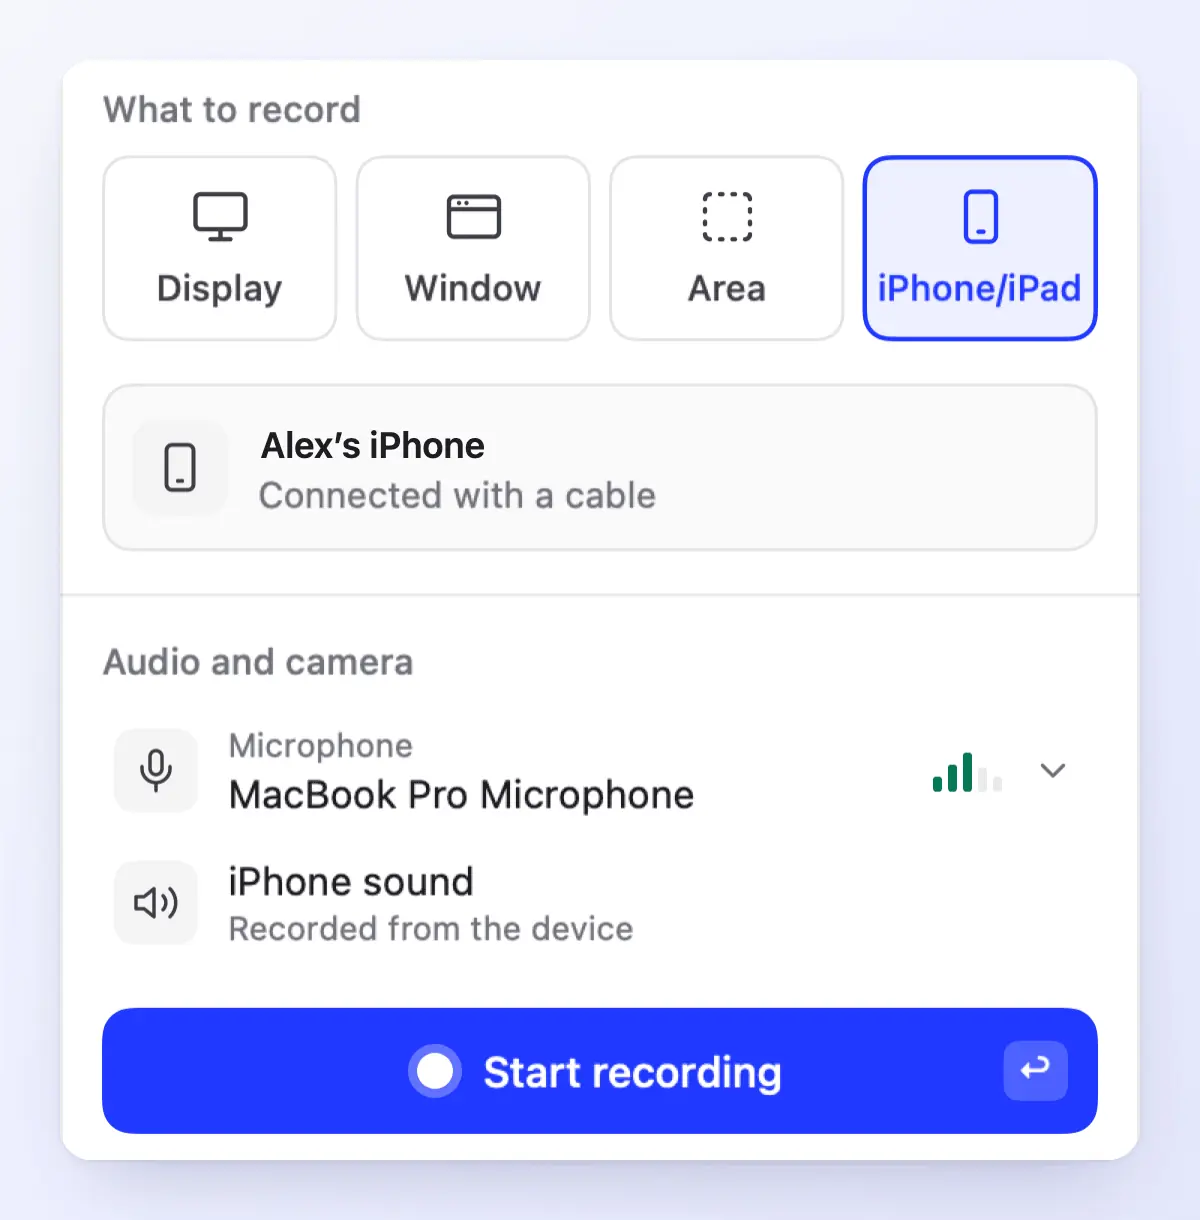
- Click Start recording, use the iPhone, then click Stop. The recording uploads to your workspace.
- Turn it into a how-to video, a product demo or an article: click Create, open a family such as How-to, and pick the recording with Choose from library. The AI writes the script from the video and what you said, and reads it in one of 30 built-in voices. Or choose Polish my footage to keep your own voice.
- In the editor, open Style > Captions and click Generate captions. Captions are made from the voice-over (or from your own voice in a Polish my footage video), so the video needs a voice first.
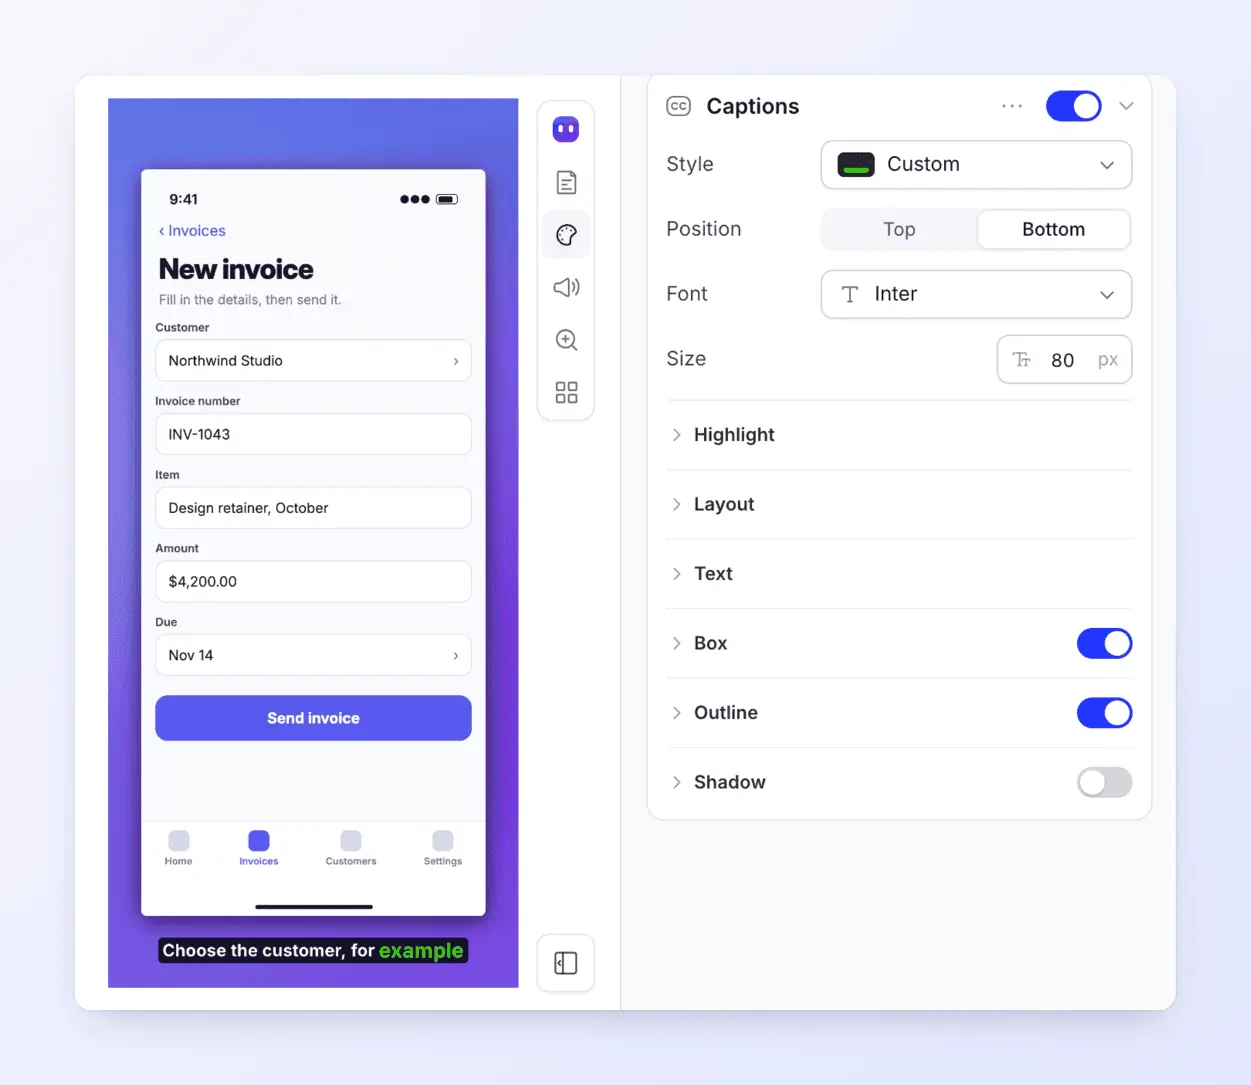
What a finished vertical how-to looks like: a narrated, captioned example from the Clevera showcase, for an invented banking app.
The same recording can also become a step-by-step help article on a hosted help center. When the app changes, re-record and regenerate; share links and embeds play the new version.
What it doesn't do:
- Mac only. Clevera for Windows and Linux record the computer's screen, not a phone.
- Taps and typing aren't captured, so there are no click steps and no zooms that follow your taps.
- No automatic zooms on portrait video. Zooming would crop the edges of the phone screen, so Clevera keeps the whole screen in view.
- No camera bubble on an iPhone recording, and one take is capped at 60 minutes.
- Not an App Store preview tool. Clevera's exports (MP4 at 60 fps) are made for help centers and demos. For an App Store app preview, edit the raw QuickTime take instead.
For device frames and fine manual control, Screen Studio also records an iPhone over USB, wraps it in a device mockup and adds captions from your voice ($9/month billed yearly or $29 monthly, as listed on 2026-11-04). It can add an AI voice-over from a script you type, but doesn't write the script from your recording or produce a written guide.
Plans. iPhone recording works on every plan, including Free. Free gives 100 credits a month, videos up to 3 minutes, and sharing by link or embed (no MP4 download). Starter ($36/month, or $29/month billed yearly) adds MP4 downloads up to 2K; Pro adds 4K. See pricing. For other recording options, see the AI screen recorder, what's new in the Clevera recorder, the best screen recording tools and how to add automatic zooms to screen recordings.
FAQ
Can I record my iPhone screen on a Mac without a cable?
Yes: record the iPhone Mirroring window with the Screenshot app (macOS 15 and iOS 18 or later, not in the EU), or record with Control Center on the iPhone and AirDrop the video. QuickTime needs a cable.
How do I record my iPhone's sound and my voice at the same time?
QuickTime records one microphone, so it's one or the other. Record with iPhone sound and add narration afterwards, use the Control Center recorder with the microphone on, or use a recorder that takes both, such as Clevera for Mac.
Why doesn't my iPhone show up in QuickTime?
Unlock the iPhone and tap Trust if it asks. Use a cable that carries data (some only charge), plugged straight into the Mac rather than a hub. Then reopen QuickTime Player and check the Camera list.
Why is my QuickTime recording of the iPhone black?
Keep the iPhone unlocked while you record. If only one app shows black, that app blocks screen recording.
How long can an App Store app preview be?
15 to 30 seconds, at up to 30 frames per second (Apple).
Turn your iPhone recording into a narrated demo
Record your iPhone from your Mac and get a voice-over, captions and a step-by-step article from the same take. iPhone recording works on the Free plan; no card needed.