Make every how-to video look like your company made it
Set up a branded how-to video template in Clevera: add your brand once, apply it to a tutorial video template, and make it the default for every new video.
 Roozbeh Firoozmand8 min read
It's Tuesday. Marketing just shipped the new logo. New colours, new font, a fresh brand guide in a shared folder. Everyone's happy.
Then you open your tutorial library. 40 how-to videos. Some have the old logo in an intro you made in Canva last spring. Some have a different intro you made in the autumn. About half have no intro at all, because you were busy that week.
This guide shows how to fix that with a branded how-to video template in Clevera: add your brand once, pick a tutorial video template, apply your brand to it, and make it the default so every new how-to looks like your company made it. Most of it costs nothing, and none of it needs a designer.
Why a Canva intro doesn't scale
A Canva intro works for video number 1. It's fine for video number 5. By video 40, it's a problem, for three reasons:
- It's a separate file. Every video needs someone to export the intro, stitch it on and re-upload. Nobody does that on a busy week.
- It only covers the start. The intro has your logo, but the steps, the recap and the ending are whatever the recording happened to look like.
- It goes stale on its own. When the logo changes, every intro is wrong at once, and fixing them means opening 40 files.
What you actually want is a look that belongs to the video, not a clip glued to the front. That's what a template is.
Step 1: Add your brand once
Open Brands in Clevera and click Add brand. You can start from your website or from your own files. Clevera pulls in your logo, colours and fonts and lays them out on one page.
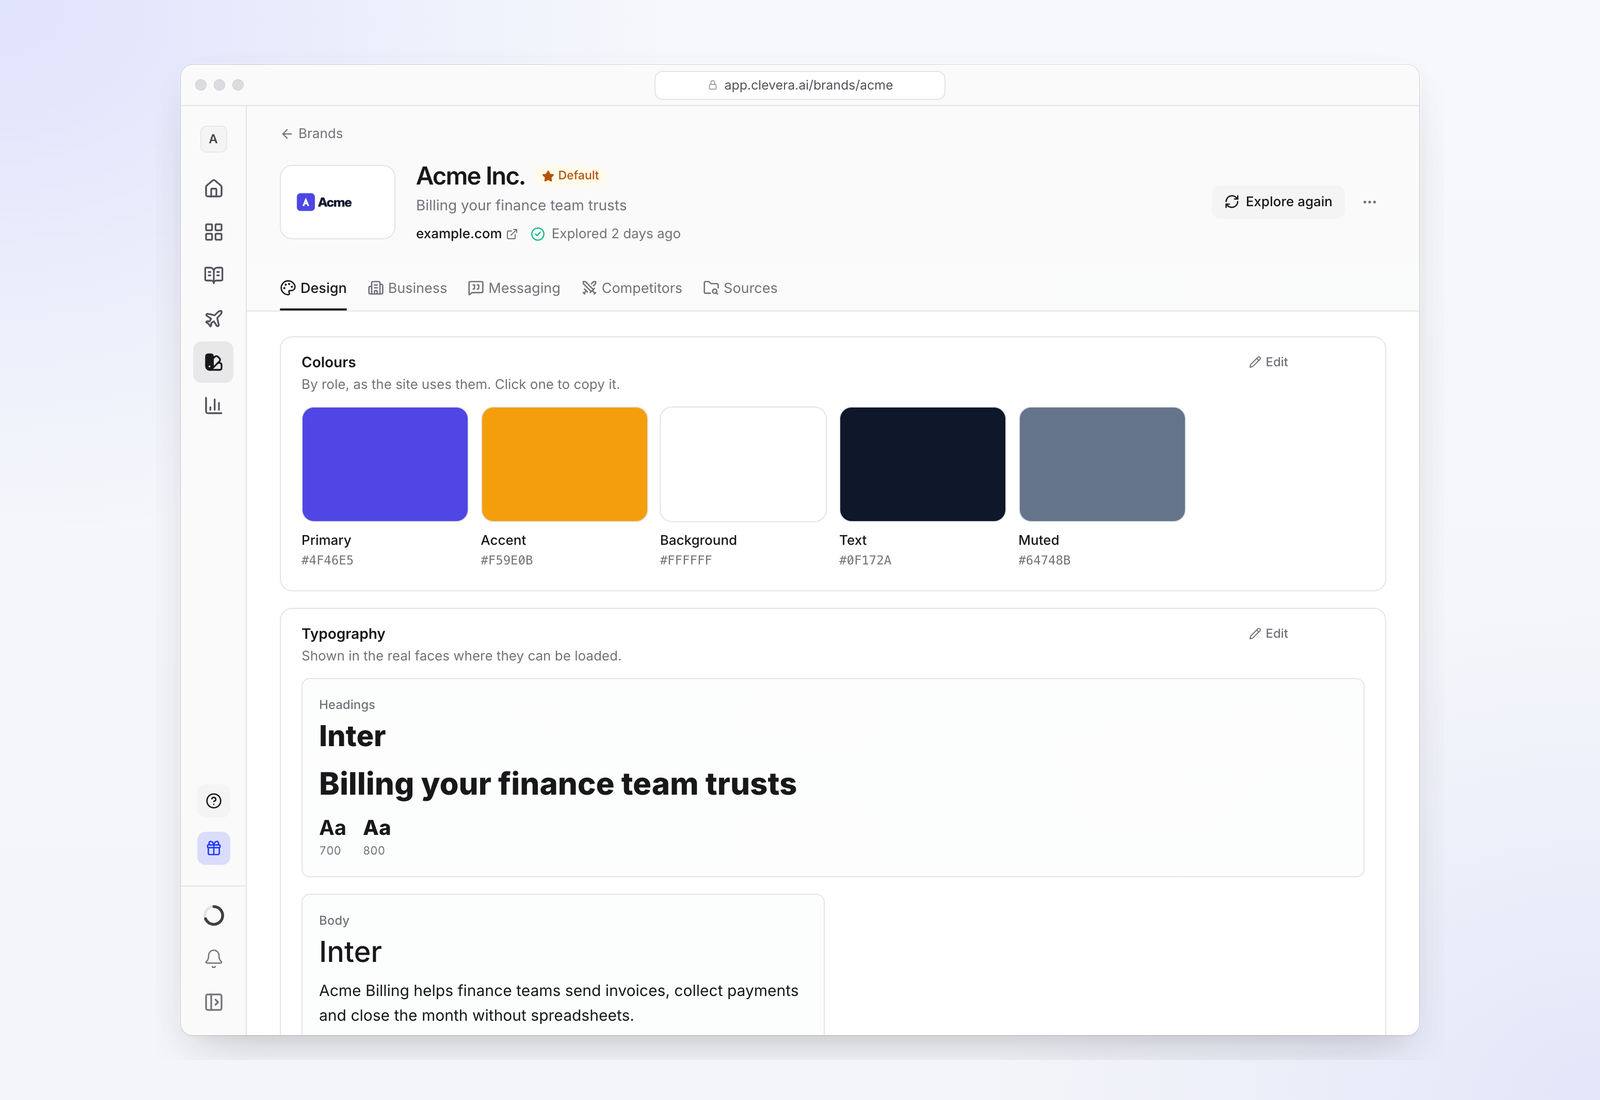
Check the Design tab first. It's split into sections you can scan in a minute:
- Colours, by role: primary, background, surface and text.
- Typography, your heading and body fonts.
- Logos, each on the background it needs.
- Buttons and corners, Key images, Imagery and Style.
- For videos, a short Do and Avoid list.
Most sections have an Edit link. If the website scan picked the wrong blue, fix it here. If the website itself changed, click Explore again.
Priya added the brand from the company website the day the new logo went live. It took a couple of minutes, and most of that was double-checking the colours.
Step 2: Pick a how-to template and apply your brand
Now start a how-to video the way you normally would, from a recording. When you get to the look of the video, open the Templates window. Its subtitle says it well: "The look, music and flow of your video."
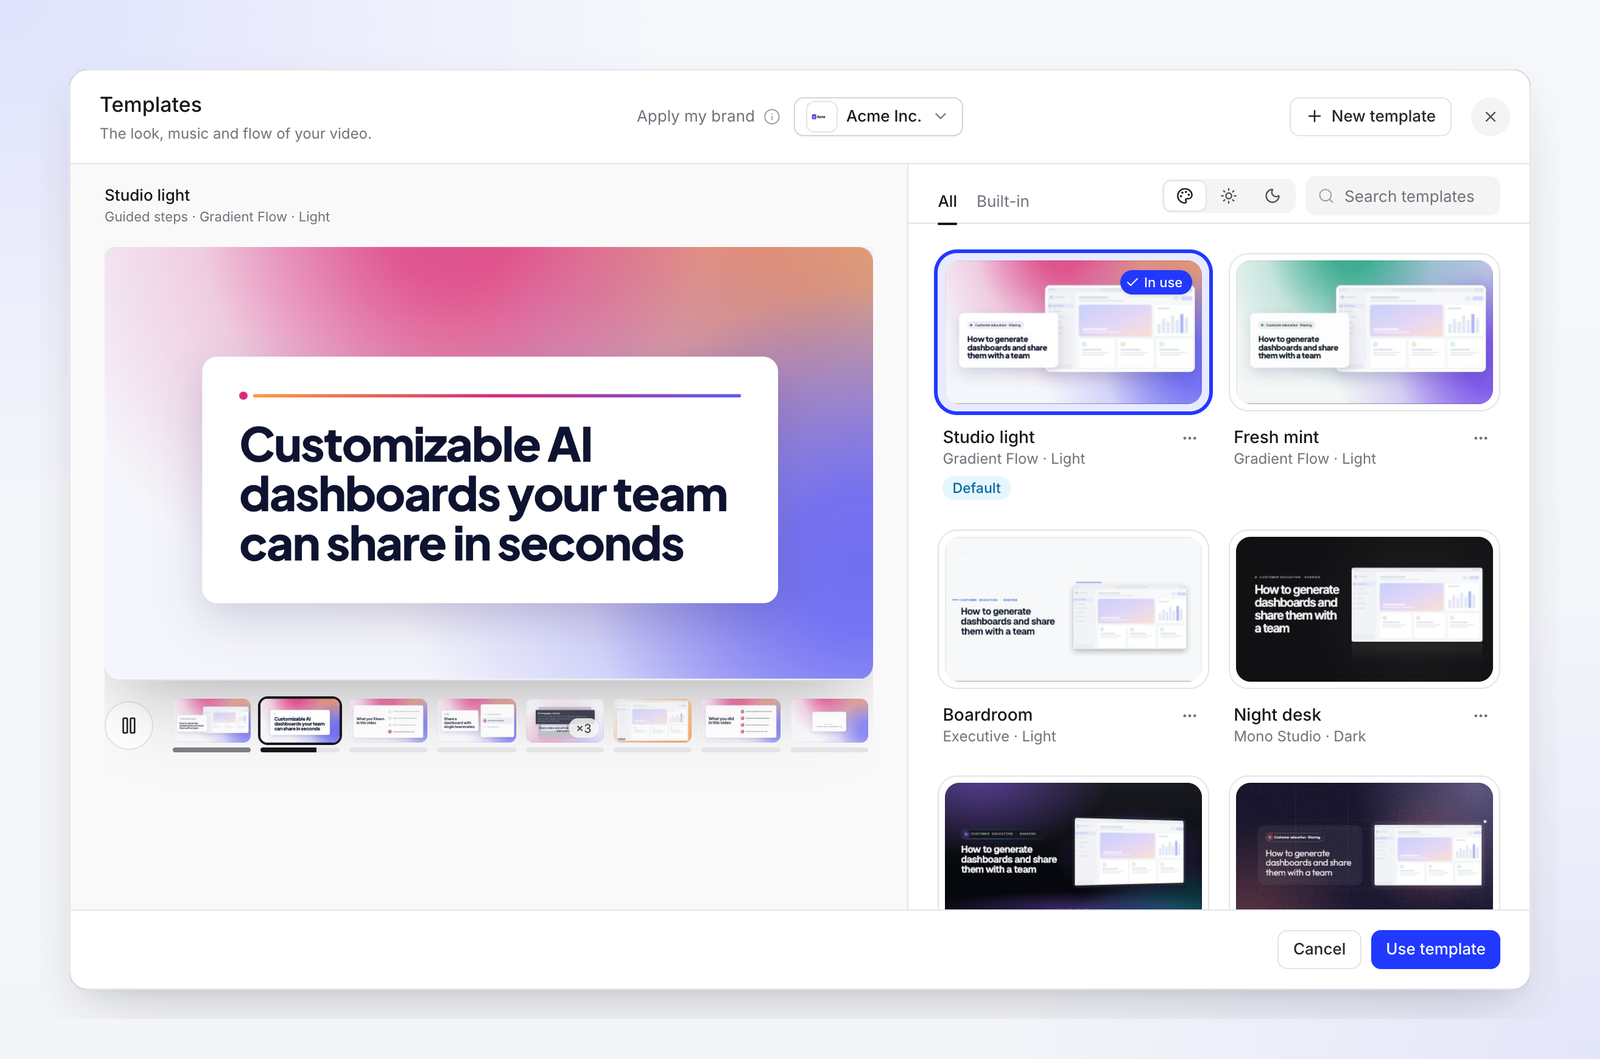
On the left is a live preview with a filmstrip of every scene. On the right are the templates. Filter by All or Built-in, light or dark, or search.
Each template gives your recording animated scenes around it: a cover, a "what you'll learn" scene, a marker before each step, a recap and your logo at the end. That's the part your Canva intro never covered.
Now the useful bit. At the top of the window is Apply my brand, with a dropdown to pick a brand.
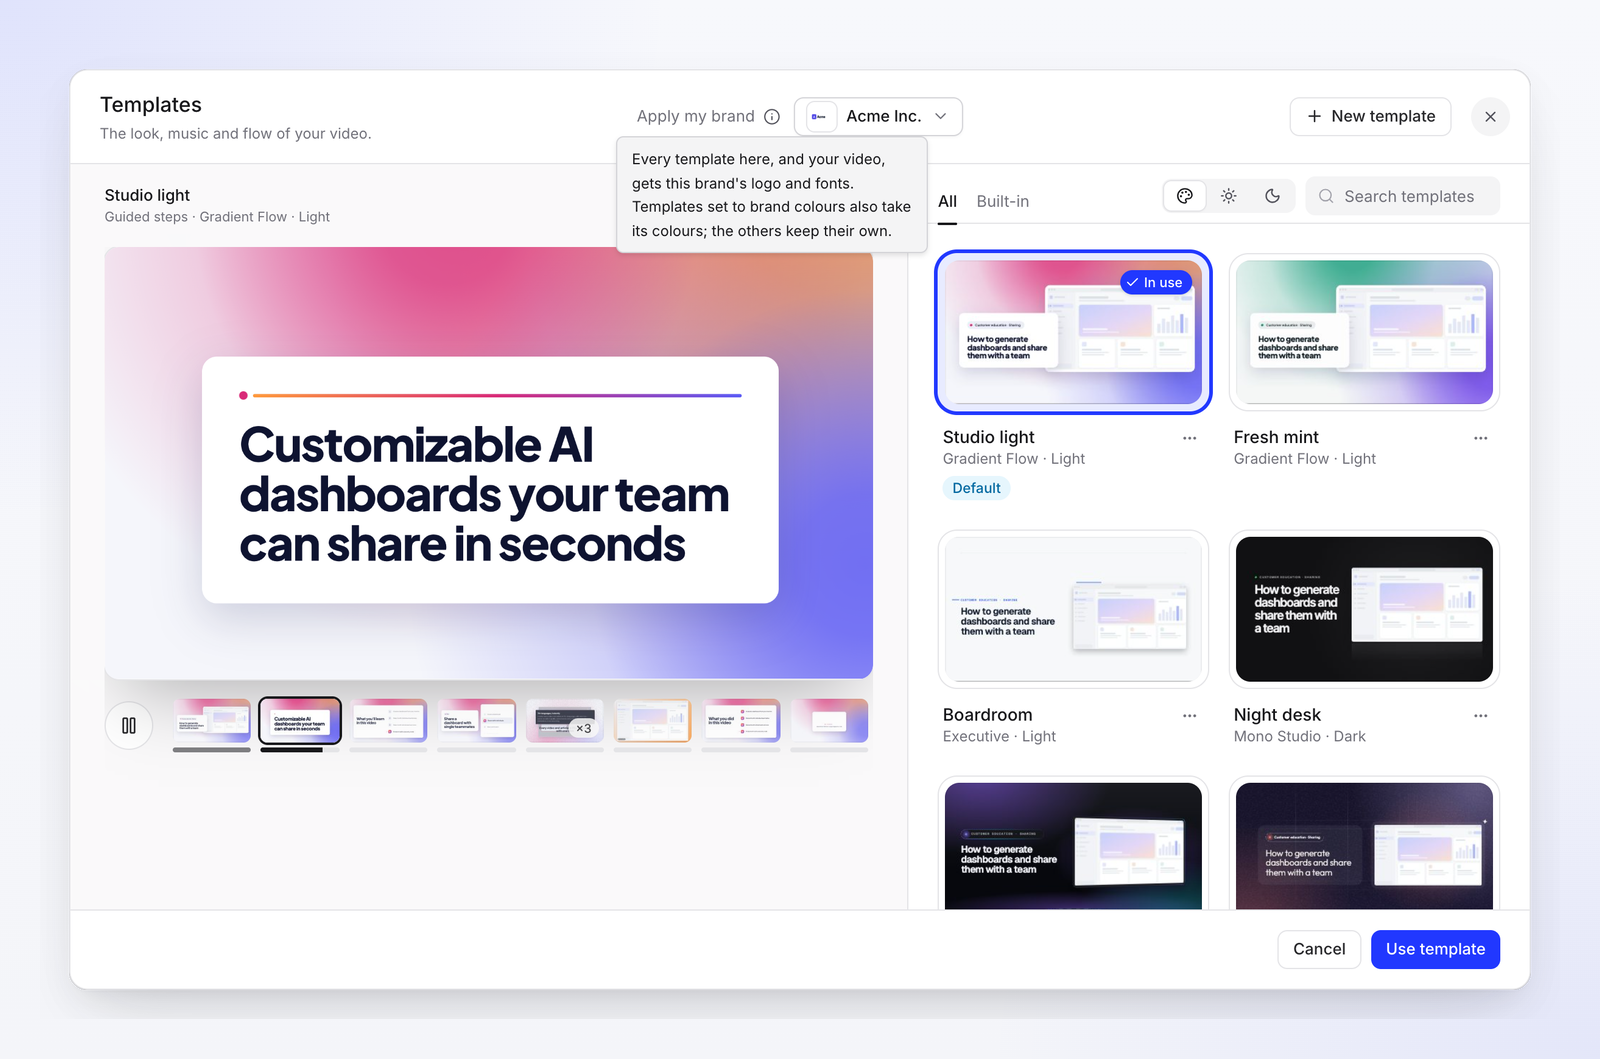
Here's exactly what it does, in Clevera's own words: "Every template here, and your video, gets this brand's logo and fonts. Templates set to brand colours also take its colours; the others keep their own."
So if you want your colours too, pick a template that uses brand colours, or make your own (next section). Click a template, watch the preview, then click Use template.
Or build your own
If none of the built-in templates feel right, open a template's menu and choose New template from this, or click New template. The builder has five tabs, and a preview you can switch between 16:9, 9:16 and 1:1.
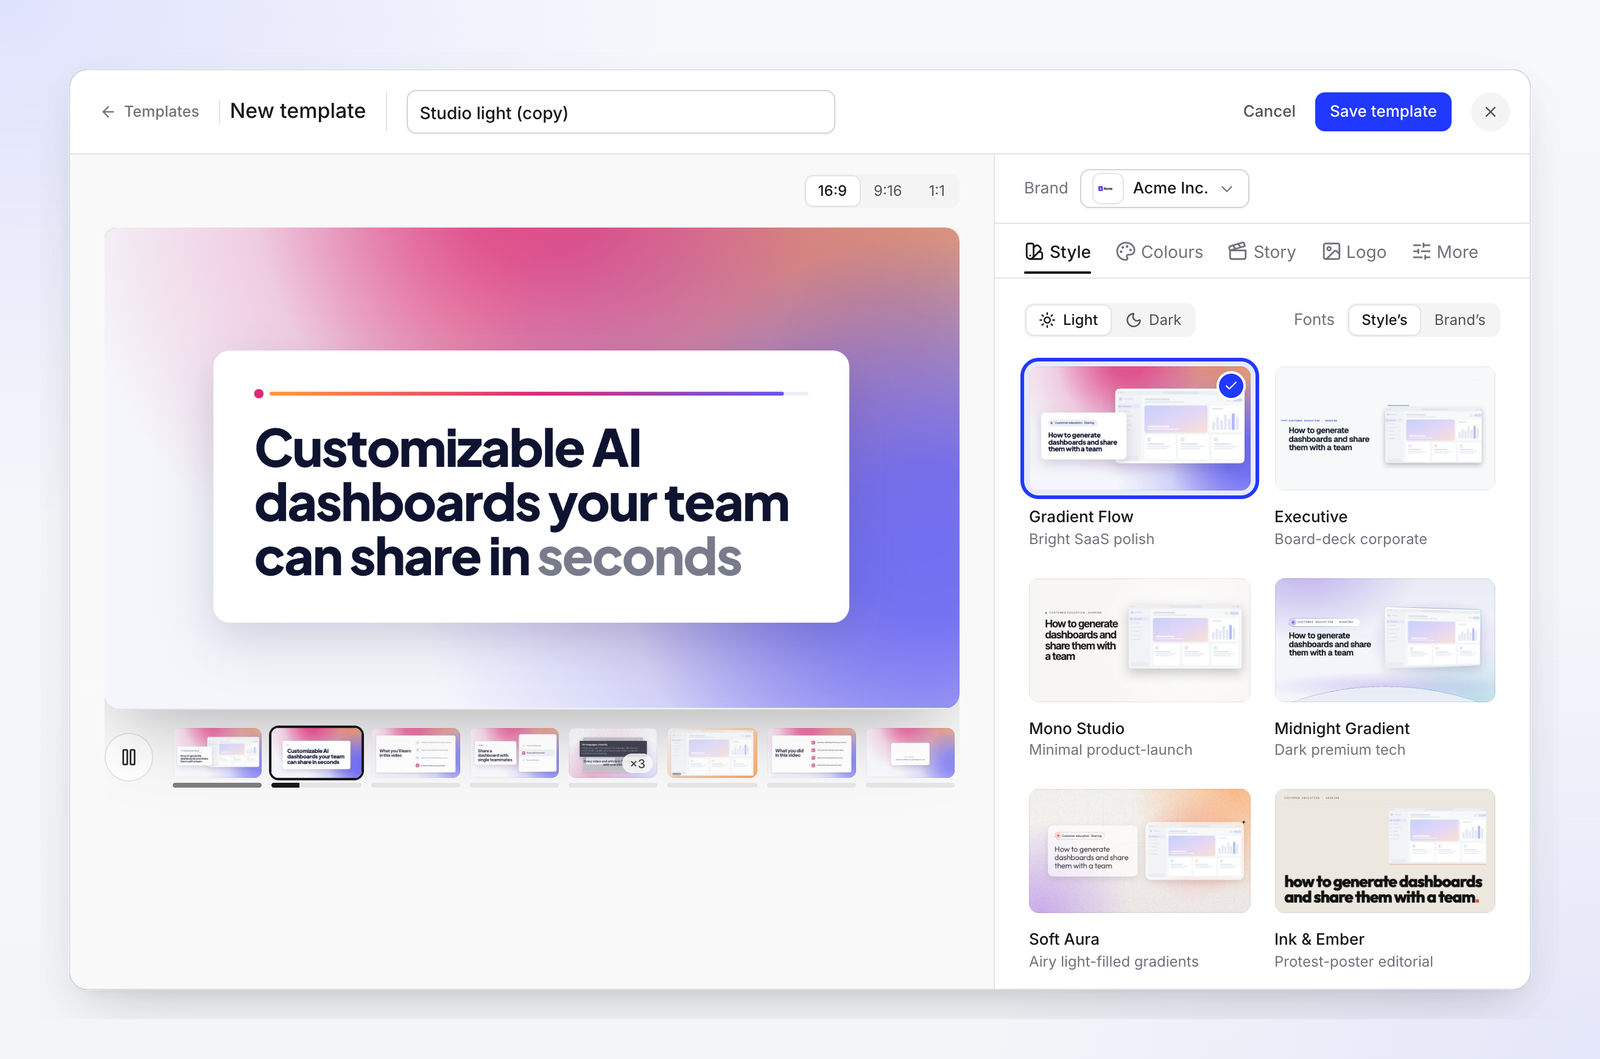
- Style. Pick Light or Dark, and whether fonts come from the style or your brand. There are 12 styles, from Gradient Flow (bright SaaS polish) and Executive (board-deck corporate) to Mono Studio, Midnight Gradient, Blueprint and Poster Punch.
- Colours. A preset set, Your brand colours, or custom.
- Story. The order of the scenes. Leave it on Follow the video type, or choose one like Guided steps, Setup guide, Fix it, Feature tour or What's new.
- Logo. Brand logo, Workspace logo or No logo.
- More. Music, background, captions and who can use it.
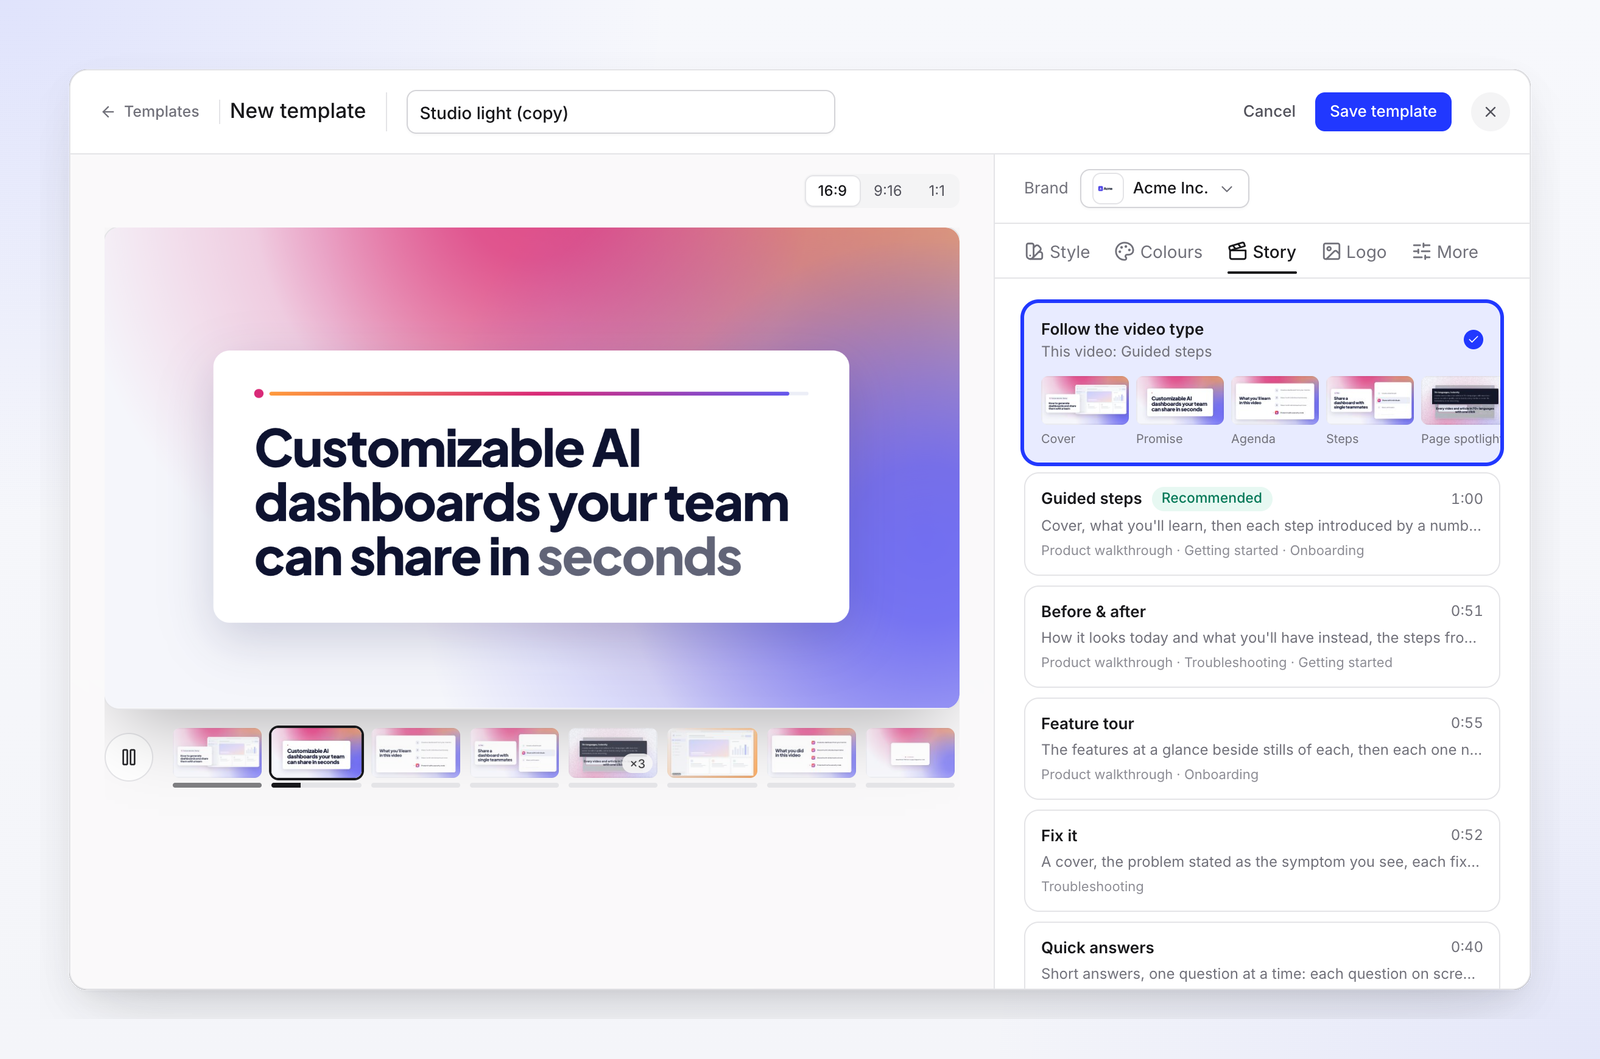
Priya kept it simple. She picked a light style, set colours to her brand, left the story on Follow the video type so troubleshooting videos get a troubleshooting flow, and chose Brand logo.
Step 3: Make it the default for every new how-to
A template only helps if people actually use it. So make it the default.
In the builder, open More. Under Who can use it, choose Everyone in the workspace. Then turn on Set as default for how-to videos. You can also do this from the Templates window: open a template's menu and click Set as default.
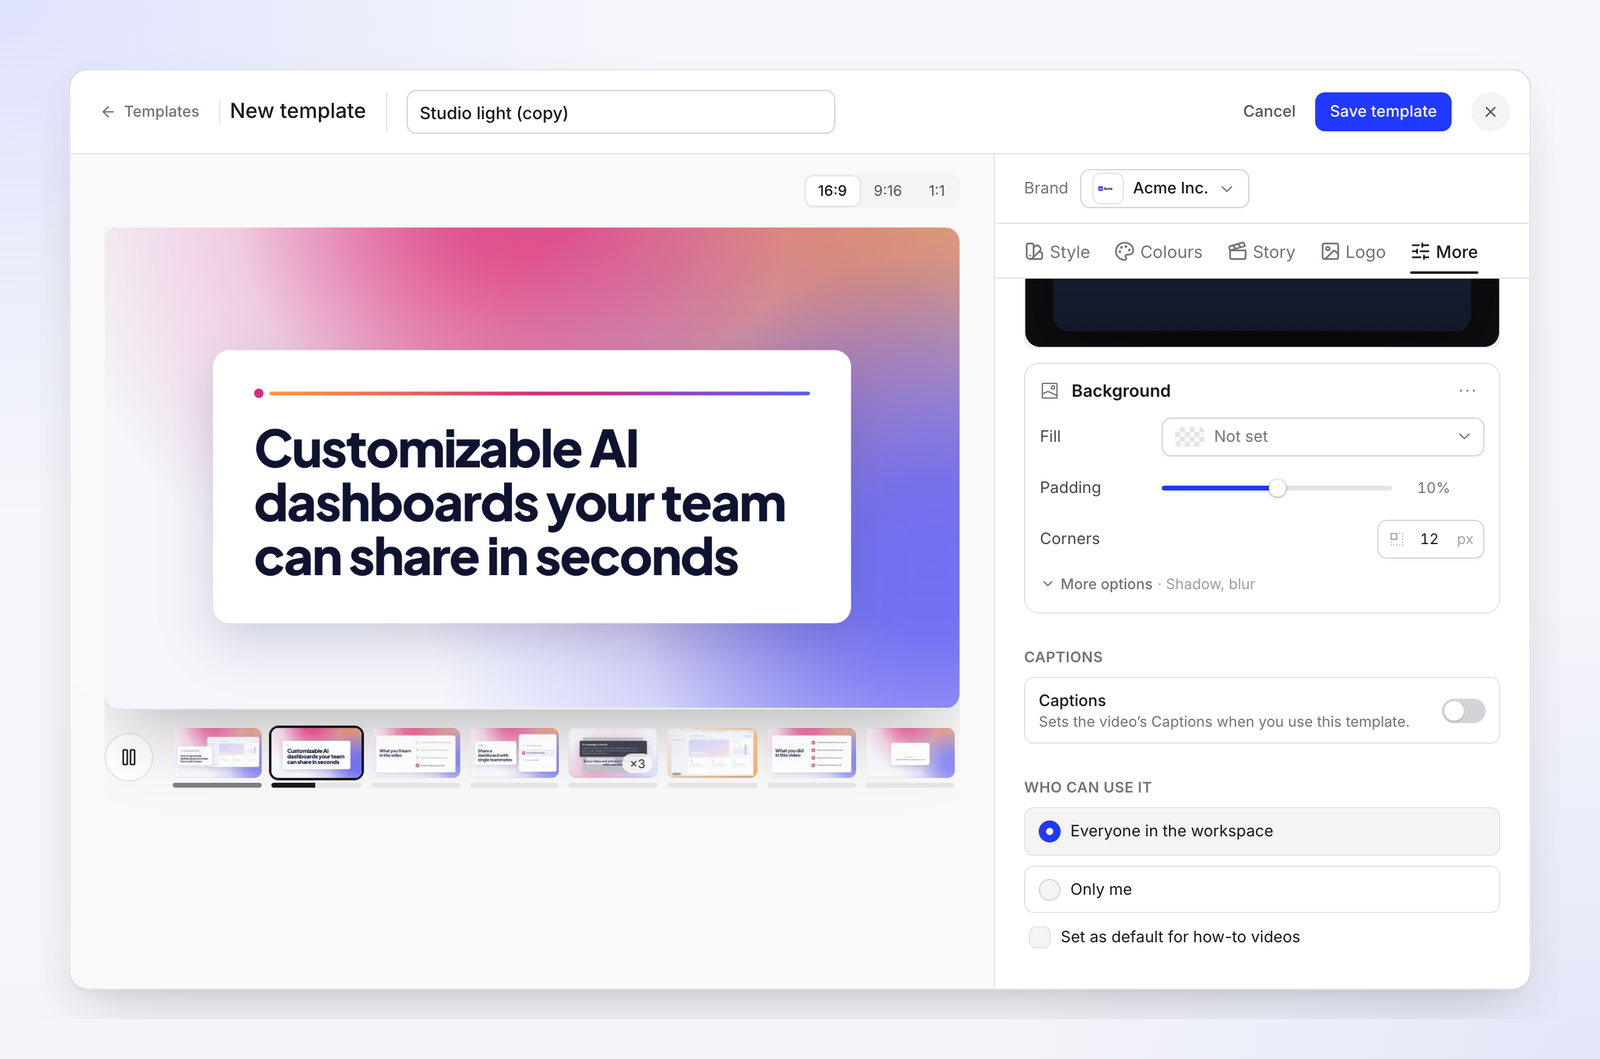
From now on, every new how-to video in the workspace starts with your branded template. Teammates who make the odd video don't need to know which intro to use. They just get it.
What a rebrand means, honestly
Here's the part worth being straight about. The template carries the brand. So the next time the logo changes, you update the brand once, and new videos follow.
Your existing videos are a different story. Today, there's no button to re-apply a template to 40 finished videos at once. For those, open each video and pick the template. It's a few clicks per video instead of a redesign, but it's still 40 visits.
Two ways to make that easier:
- Start with the top 10. Do the most-watched videos and the ones linked from onboarding emails first. The rest can wait for their next update.
- Do it when you're already in there. When a release changes a screen and you're updating a video anyway, pick the template in the same pass. Our guide to updating tutorial videos after a UI change has a triage system for exactly that.
What it costs
Adding a brand, browsing templates, building your own and setting the default showed no credit cost when we tried it. Credits come in when you make the video itself. When we started a how-to, Clevera showed an estimate of about 20 to 50 credits, and that estimate appears before anything starts.
A consistency checklist for your tutorial library
Copy this into your team notes.
- Brand added, and colours, fonts and logos checked on the Design tab
- For videos Do and Avoid filled in, so the brief is written down
- One how-to template picked or built, using Your brand colours and Brand logo
- Template shared with Everyone in the workspace
- Set as default for how-to videos turned on
- Top 10 existing videos switched to the template
- A note in your release checklist: "pick the template when you touch a video"
- On the next rebrand: update the brand first, then check one new video before anything else
One look, set once
Priya didn't fix 40 videos on Tuesday. She added the brand, built one template, made it the default and switched her 10 most-watched videos. Every video since then has looked like the company made it, without anyone thinking about it.
If you're still making tutorials by hand, start with Clevera's AI tutorial maker, which turns one recording into a narrated how-to video. And if you'd rather ask an AI assistant to do it for you, here's how to make a how-to video with Claude or ChatGPT.
Make your next how-to video look like you made it on purpose
Add your brand once, pick a template, and let every new tutorial follow it.