Wistia integration
Upload AI videos to Wistia, straight into the right project
Make a product or how-to video from a screen recording in Clevera, then send it into a project of your Wistia library with its name and description already written. Nothing is embedded until you place it.
Lands in the project you pick
AI title and description
Not embedded until you say so
No per-send fee
What you can do
Your Wistia library, kept stocked,
without the export-and-upload shuffle.
Wistia is where the videos on your website, help center and landing pages live. The Wistia integration skips the download from one tool and the upload to the other: the finished video goes straight to the right project, named and described.
Feature videos for your website
Record the feature, let Clevera turn the recording into a narrated product video, and send it to the project your marketing site embeds from. Swap it into the page when it’s ready.
How-to videos for your help center
Support teams turn screen recordings into short how-to videos and keep them in a Wistia project of their own, ready to embed next to the help article they explain.
Every video in the right project
Pick the project when you send. Clevera remembers your last choice for each account, so the onboarding series keeps landing in Customer onboarding without anyone dragging files around.
Nothing goes live by accident
Videos arrive as new media in your library, not embedded anywhere. Your site only changes when someone places the video from Wistia.
A new version when the product changes
Fix the video in Clevera after a release and send it again. Each send creates a fresh media item, so you decide in Wistia when the old one is replaced.
Access you can read in one line
Clevera connects with a Wistia API token that can only read your folders and media and upload videos. Nothing else is asked for.
How it works
From screen recording to your Wistia library
in four steps.
Paste a token once. After that, every finished video is a project choice and a click away from Wistia.
- 1
Paste a Wistia API token
Create a token in Wistia with read and upload permissions, then paste it into Connect Wistia in Clevera. - 2
Clevera names and describes it
Tick the Wistia account in the Publish window. The AI writes a title and a description from the video’s script. - 3
Pick the project and send
Choose the project (folder), check the text and click Send as draft to Wistia. - 4
It waits in your library
Wistia processes the video and it appears in the project, unembedded, ready for you to place.
See it in Clevera
Name, describe, file it,
all before it leaves Clevera.
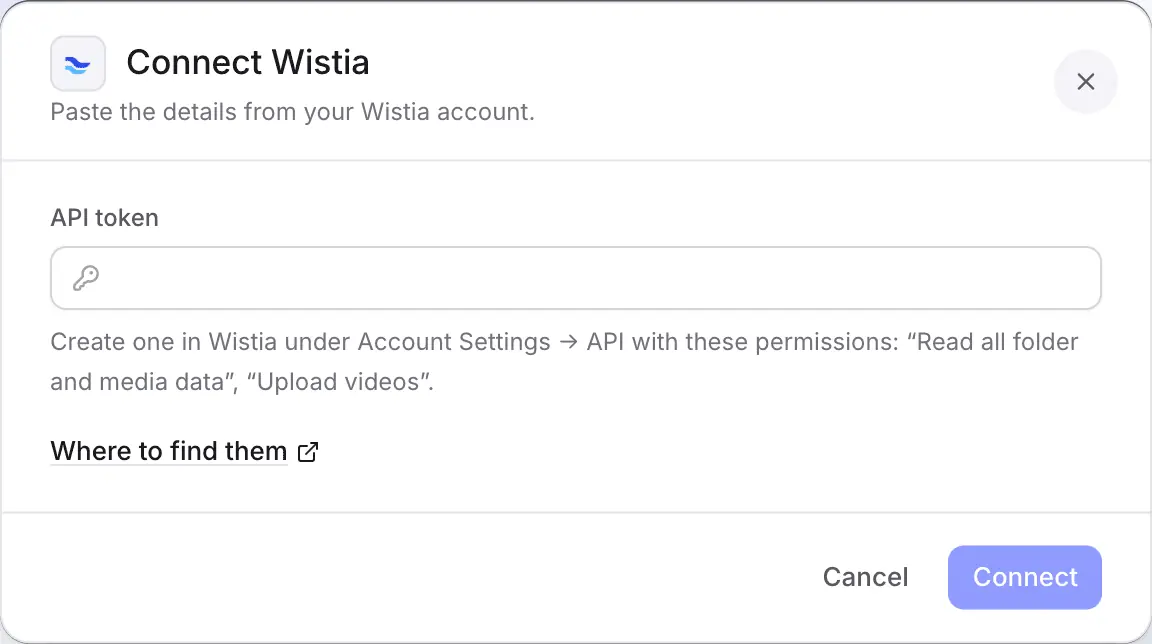
The Publish window shows the Wistia fields on the left and, on the right, how the video will be listed in its folder: the path, the name and the description.
A title, a description and a destination
The AI writes the title and a plain-text description in the language of the video you send. Edit either; changes save as you type, and Rewrite gives you a fresh pair if the first doesn’t fit.
The preview marks the video Not embedded yet, because that’s exactly how it arrives: in your library, private to your Wistia account until you embed or share it.
Your projects, in a sensible order
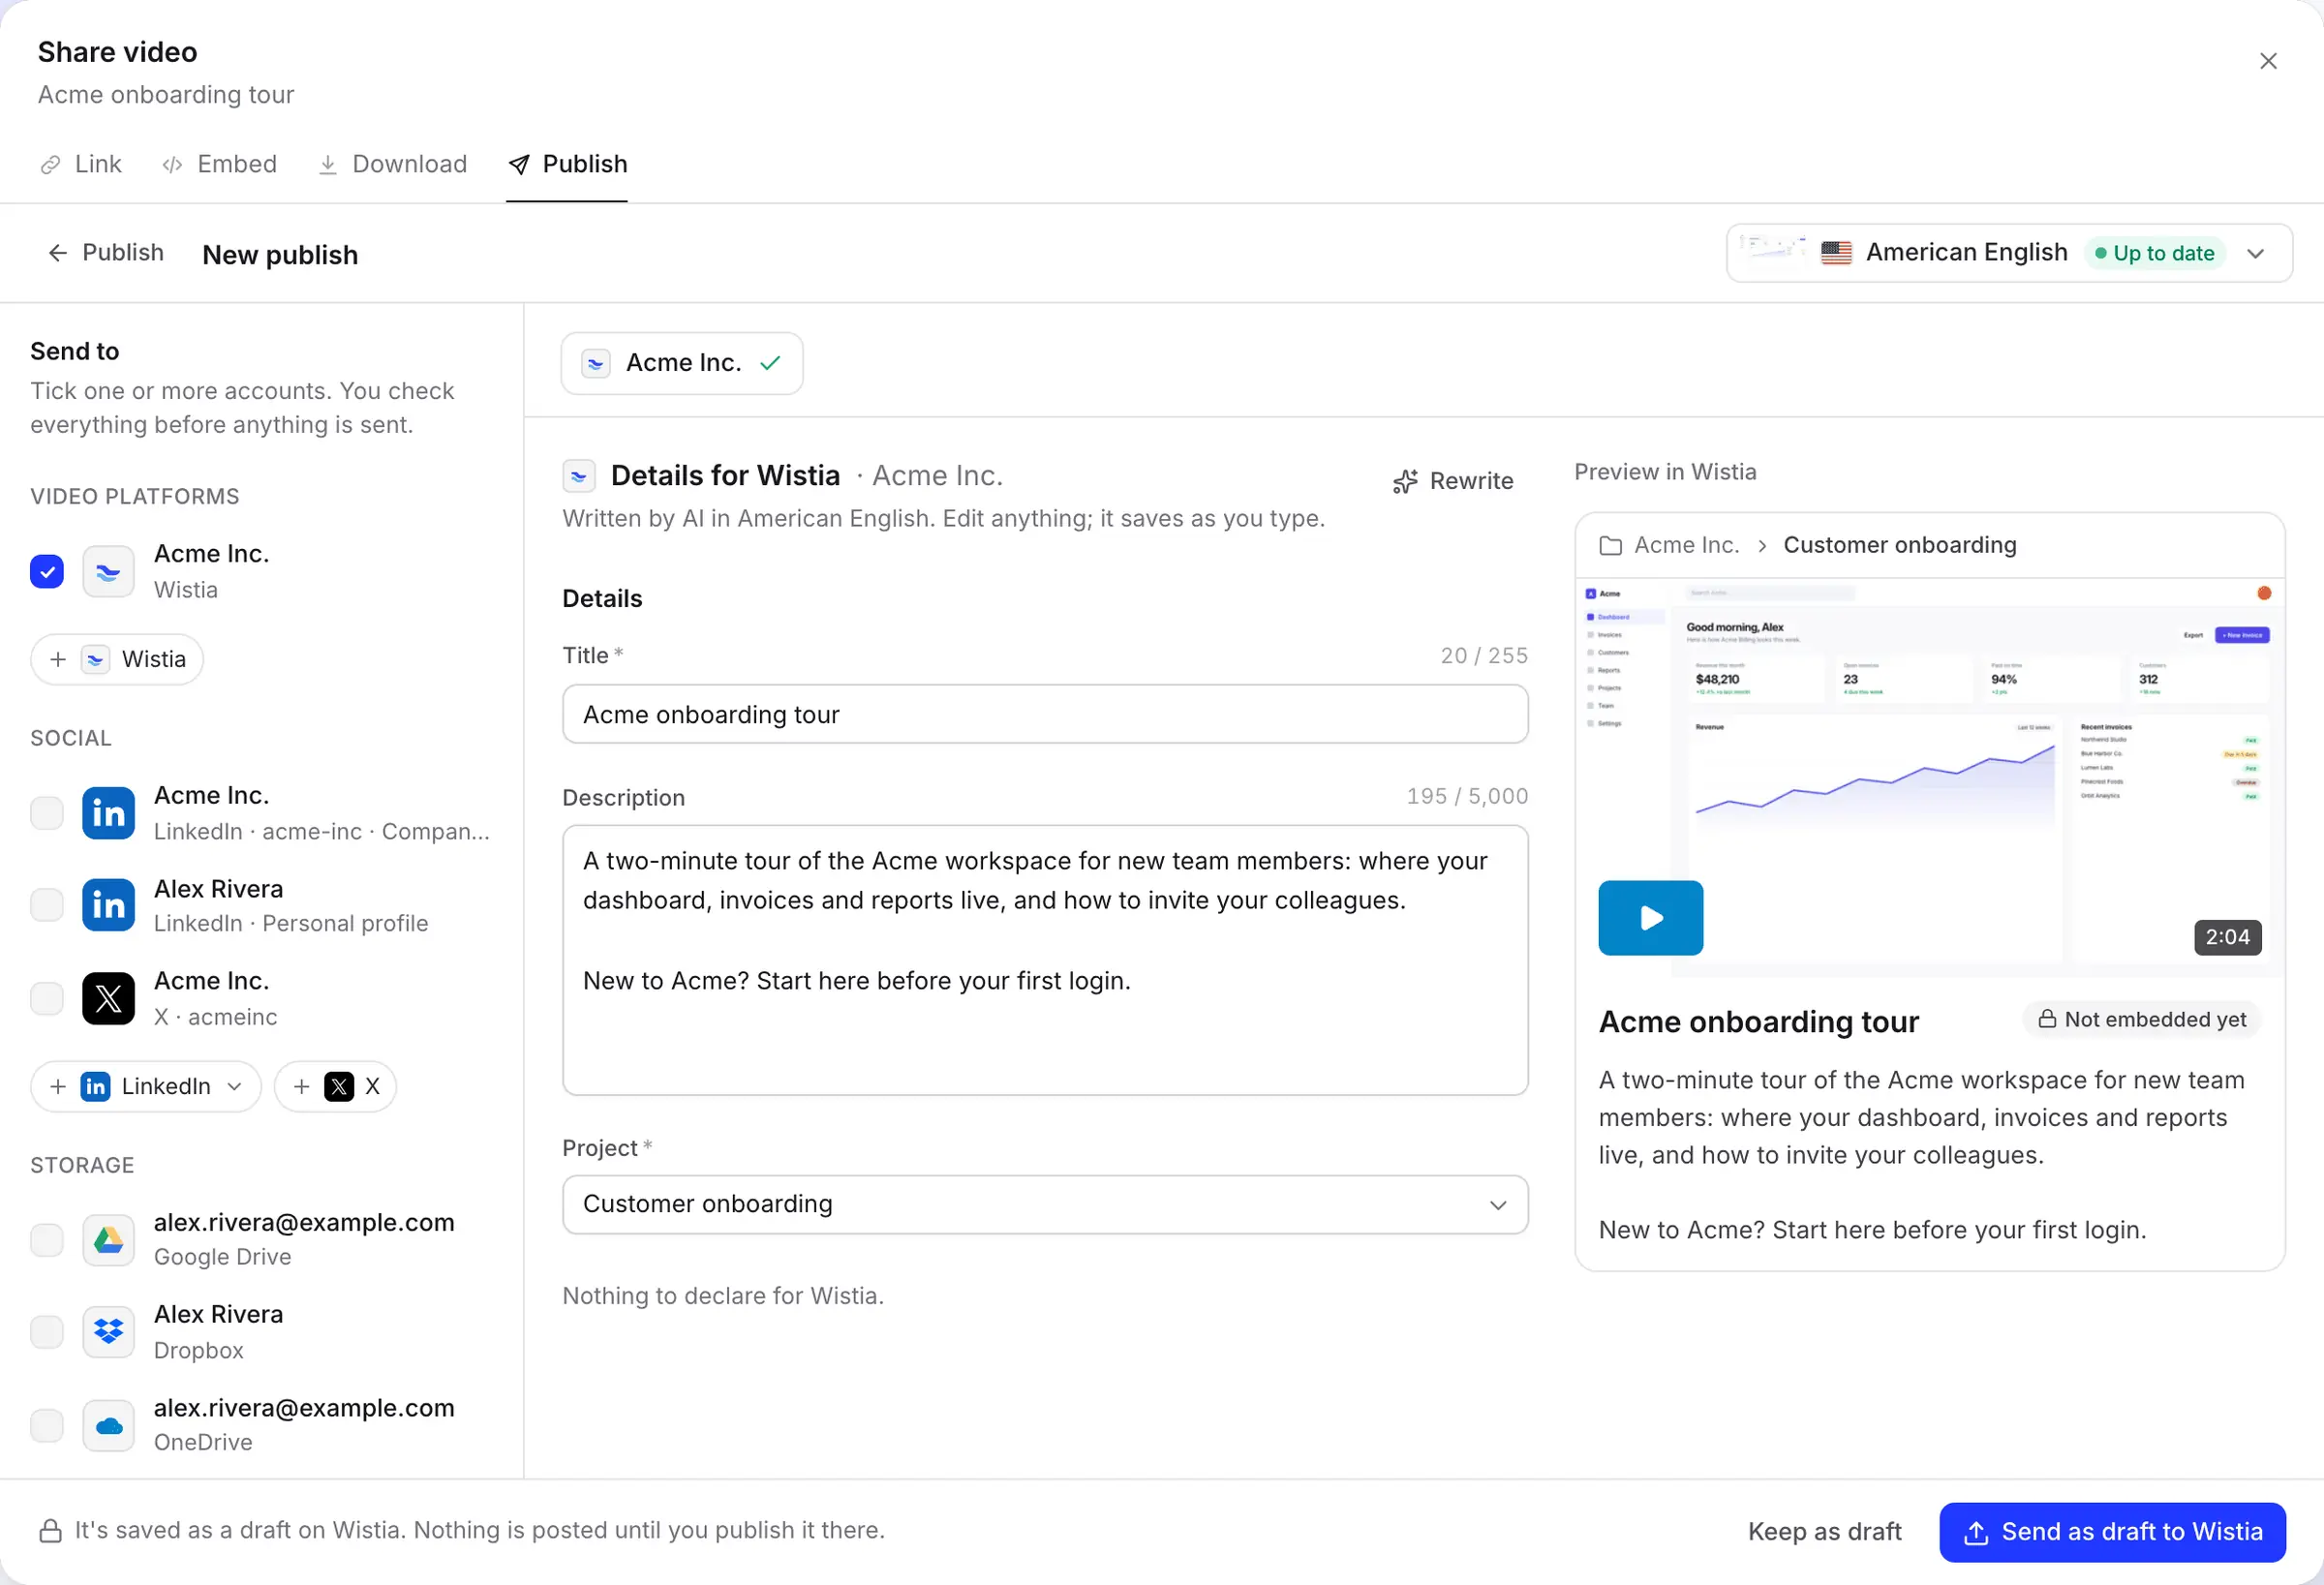
The Project list shows every folder your token can read, sorted by name, with folders from your Video Library first. Wistia’s own folders, such as Bumpers and Sample live event, move to the end.
Created a folder a minute ago? Clevera refreshes the list about once an hour; reconnect the account to see it straight away. Clevera says Project because Wistia’s API still uses that word for a folder.
Connect with a token, checked on the spot
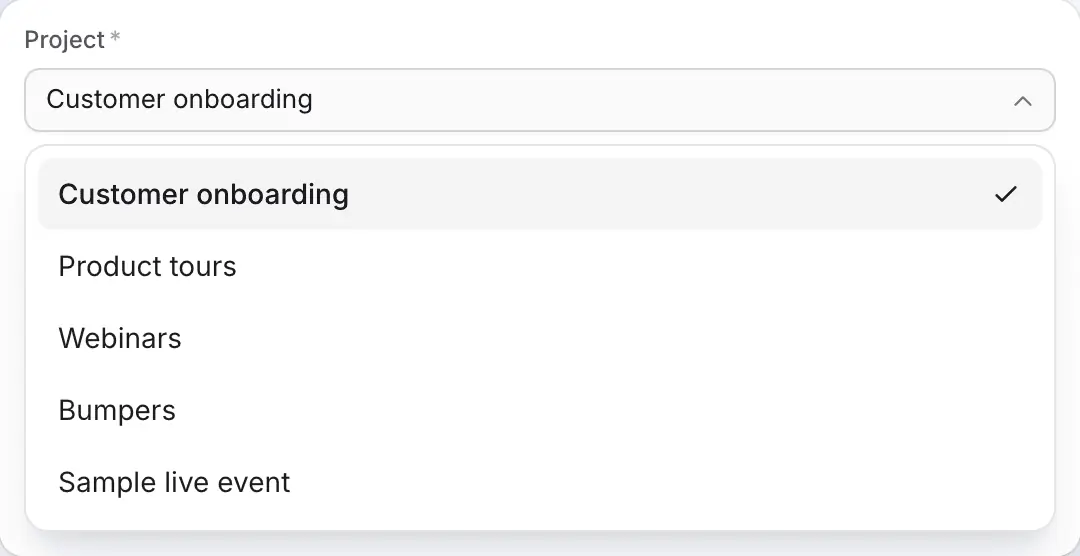
Wistia only offers app sign-in to some accounts, so Clevera connects with an API token that your Wistia Account Owner creates under Account Settings, then API.
Clevera tests the token before saving it. A token that can read but not upload is refused there and then, so you don’t find out at your first send.
Filled in for you
What Clevera fills in
for each Wistia upload.
Wistia keeps media simple, and so does the integration: a name, a description and the folder it belongs in.
- TitleAI writes it
- The media name in Wistia, up to 255 characters. The angle brackets
<and>aren’t allowed in a Wistia name. - DescriptionAI writes it
- A plain-text summary of what the video covers, up to 5,000 characters, written in the video’s language.
- ProjectYou choose
- The Wistia folder the video goes into. Required, and remembered for each account, so the next send defaults to the same one.
- Video fileSet for you
- The finished render in the language you picked, uploaded as an MP4 of up to 8 GB. No render yet? Clevera renders it first and sends it when it’s done.
Setup
Set up the Wistia integration
in about three minutes.
You need a Clevera workspace on the Pro plan or above, and your Wistia Account Owner, who is the only person who can create API tokens. A Clevera workspace owner or admin pastes the token; then anyone who can edit a video can send it.
- 1
Create a token in Wistia
As the Account Owner, open Account Settings → API and create a token with Read all folder and media data and Upload videos. Copy it: Wistia shows it only once. - 2
Paste it into Clevera
In Clevera, open Integrations, find Wistia under Video platforms, click Connect, paste the token and click Connect. - 3
Open the video’s Publish tab
In the editor, click Share, open Publish, click Publish… and tick the Wistia account. - 4
Pick the project and send
Check the title and description, choose the Project and click Send as draft to Wistia. - 5
Embed it from Wistia
When the row turns green, click Open on Wistia and embed or share the video as you would any upload.
Wistia integration questions
Connect Wistia once with an API token, then open any finished video, click Share, then Publish, tick your Wistia account, pick a project and send. The video lands in that project of your Wistia library.
No. The video arrives in your Wistia library, unembedded. Embed it from Wistia when you’re ready, or use Clevera’s own player instead.
Wistia only turns on app sign-in for some accounts, so a token works for everyone. It needs just two permissions: read folders and media, and upload videos.
Wistia renamed projects to folders, but its API still calls them projects. They’re the same thing.
Up to 8 GB per video, at least one second long, with no maximum length. The upload also counts toward your Wistia plan’s own limits, like any other upload.
No. There’s no per-send fee, and the AI-written title and description are free. See pricing for what making videos costs.
Not from Clevera. Wistia picks a thumbnail you can change there, and tags, chapters and scheduling aren’t part of the Wistia integration.
Disconnect the account on Clevera’s Integrations page, then delete the token in Wistia under Account Settings, then API. Wistia has no way for apps to revoke a token, so it stays valid until you delete it.
Record it today. Embed it from Wistia tomorrow.
Clevera turns your screen recording into a narrated video and files it in the right Wistia project, named and described.