OneDrive integration · Cloud storage
Save screen recordings to OneDrive automatically
Built for teams that run on Microsoft 365. Turn a screen recording into a narrated video in Clevera, then save the MP4 into your OneDrive with a personal or a work account, filed by collection and ready to share the Microsoft way.
Work, school and personal accounts
Access to your own OneDrive only
A subfolder per collection
Nothing is posted
What you can do
Training and how-to videos
where Microsoft 365 people look.
In a Microsoft 365 company, files live in OneDrive and get shared from there. Clevera saves each finished video straight into it, so your training, onboarding and support videos sit next to the rest of your work.
Your work account, not a side account
Sign in with the Microsoft work or school account you use every day. The video lands in your OneDrive for work, under your organization’s own storage and policies.
Course material, filed by course
Keep each course or onboarding track as a collection in Clevera. Its videos land together in a OneDrive subfolder with the same name.
Synced to every laptop
Because the video is a normal file in OneDrive, it syncs to the computers where OneDrive is set up, ready to open offline or drop into a slide deck.
Narrow access by design
Clevera asks for your own files only. It doesn’t request access to other people’s files, to SharePoint sites or to your organization’s directory.
Queue it before the render
Save while the video still needs rendering. Clevera renders it first and sends the file to OneDrive by itself when the render is done.
Personal and work, side by side
Connect a work OneDrive and a personal one, or one per teammate. Tick several in one publish and each gets its own copy.
How it works
From recording to OneDrive
in four steps.
A workspace owner or admin connects the Microsoft account once. From then on, anyone who can edit a video can save it to that OneDrive.
- 1
Sign in with Microsoft
Connect from Clevera’s Integrations page and pick a personal or a work or school account on Microsoft’s page. - 2
Name and folder, filled in
In the video’s Publish window, tick OneDrive. The file is named after the video and filed under its collection. - 3
Check the path and save
The preview shows OneDrive / Clevera / your collection. Adjust if needed, then click Save to OneDrive. - 4
It’s in your OneDrive
The row in Clevera reads Saved to OneDrive. Open in OneDrive opens the file, ready to share.
See it in Clevera
One window, one click,
one file in OneDrive.
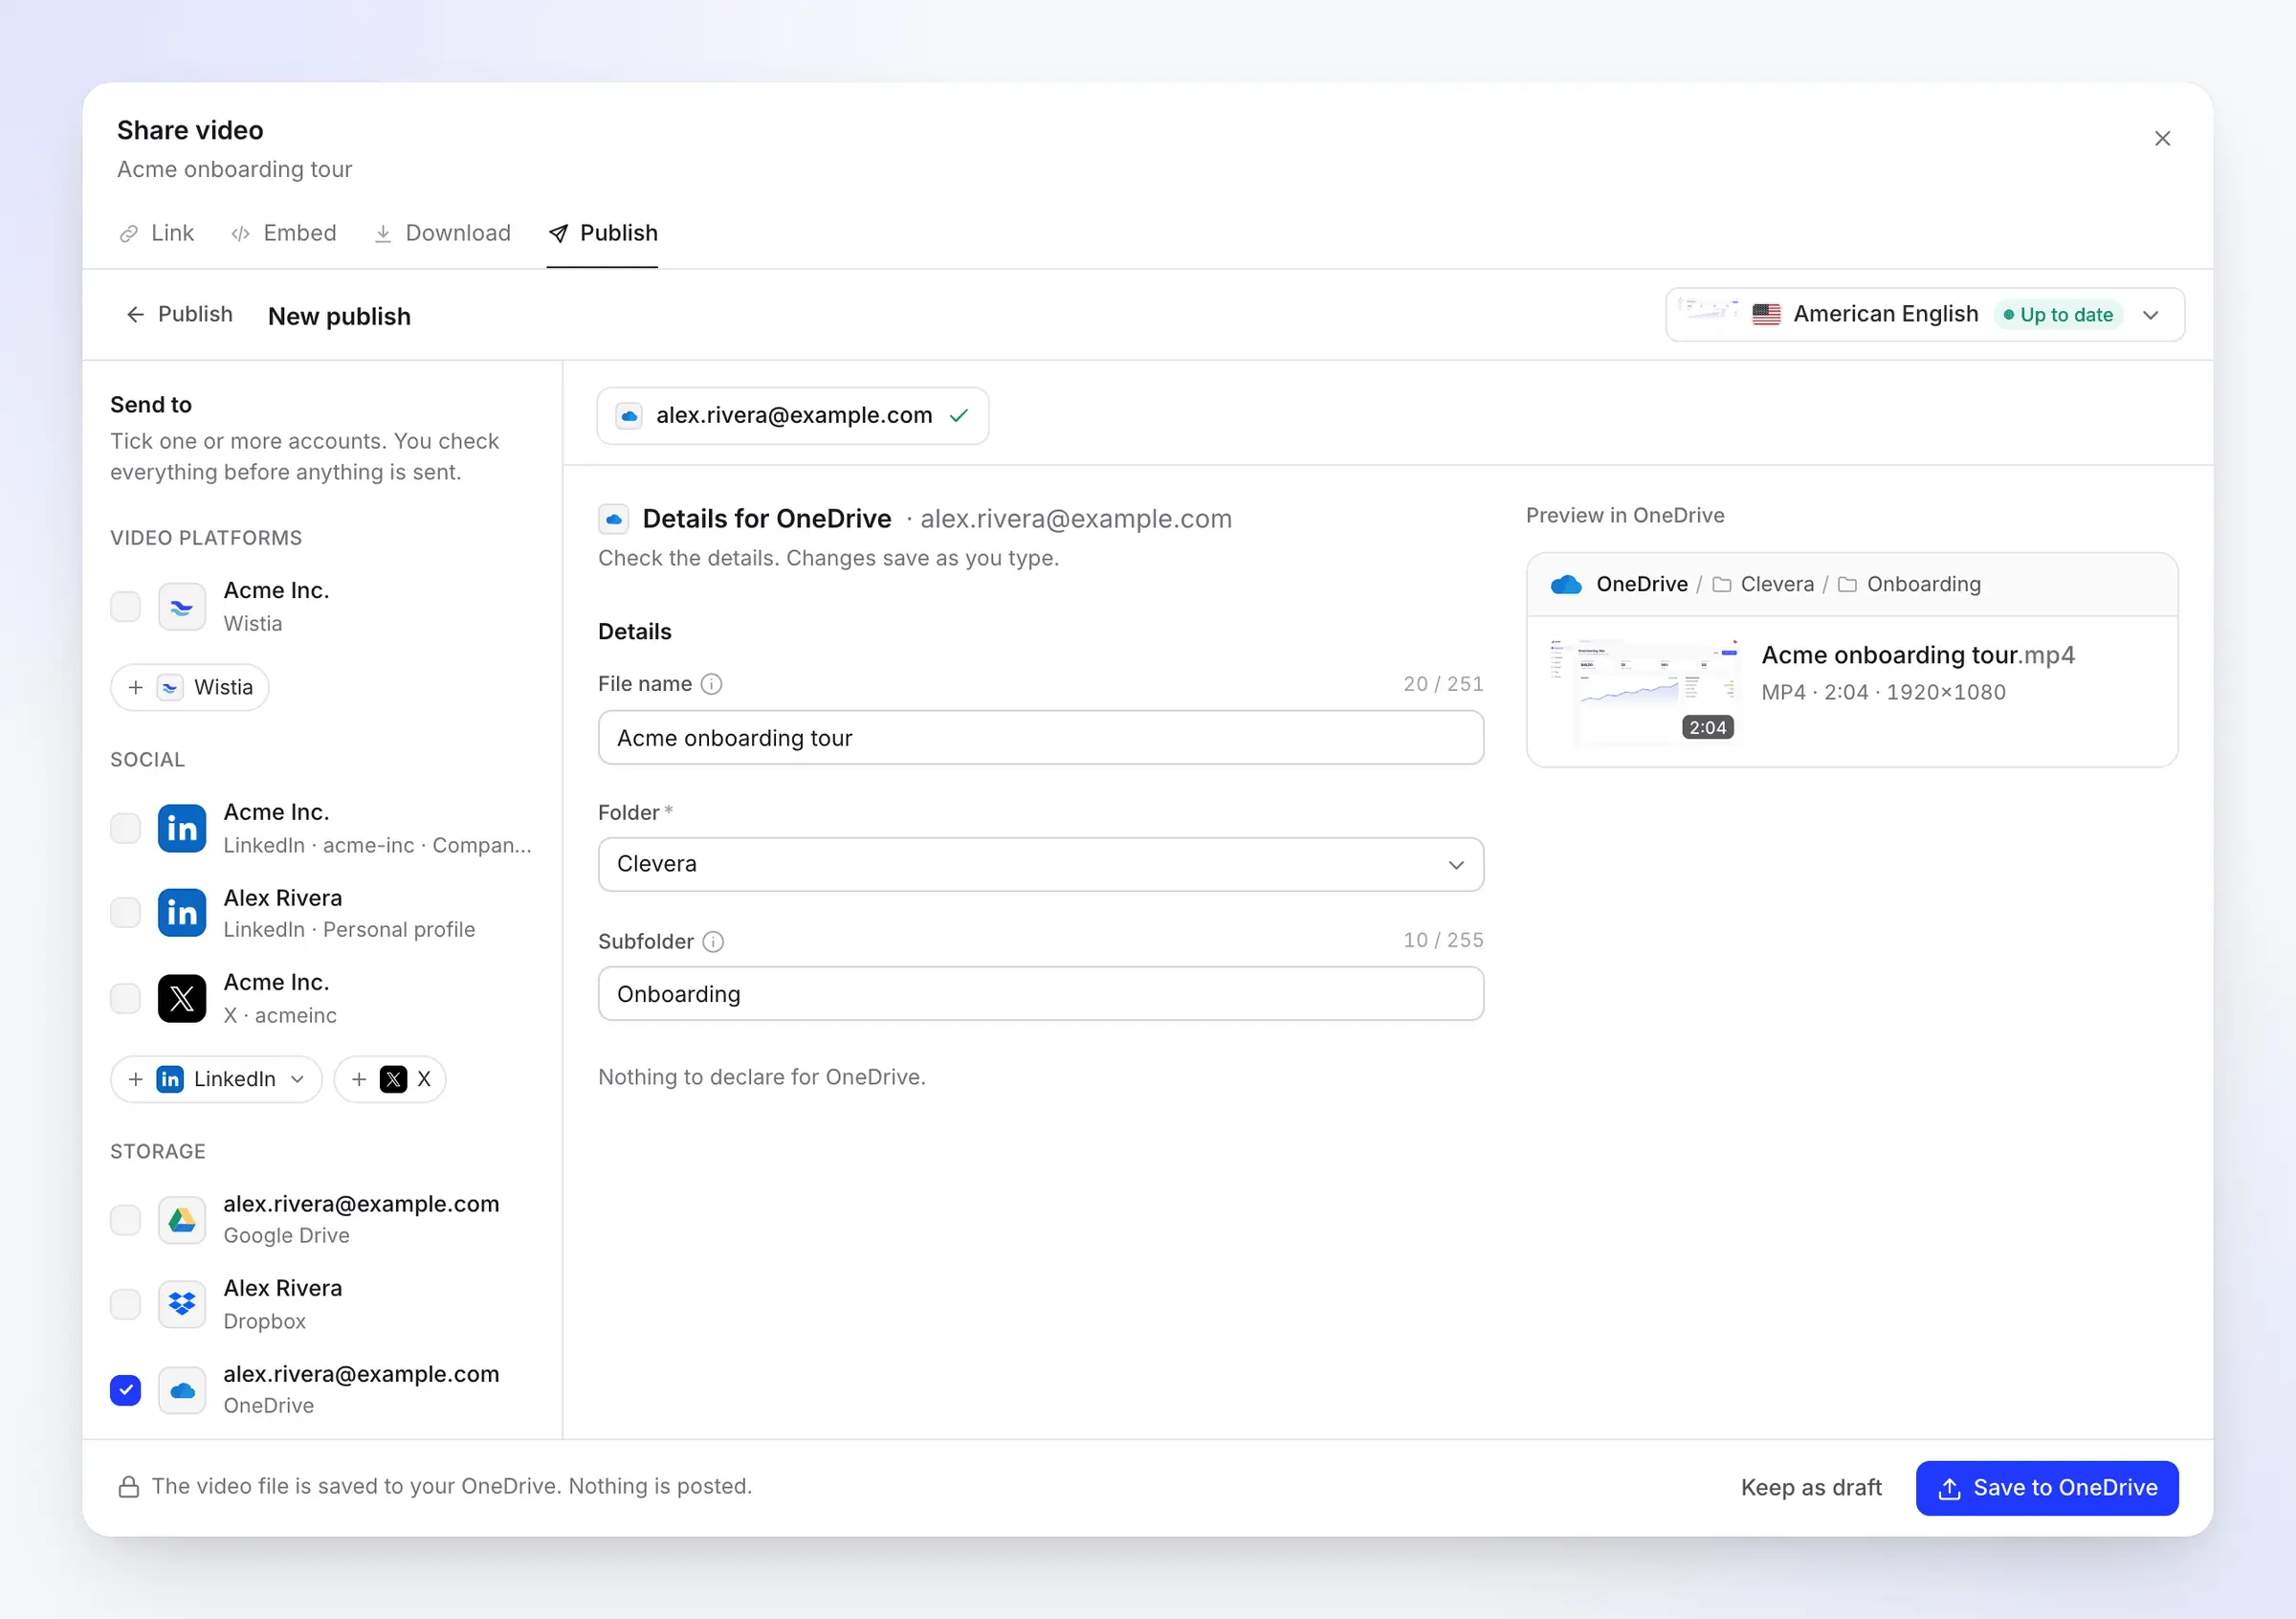
OneDrive gets the same Publish window as every platform in Clevera: you tick the account, the details are already filled in, and a preview shows exactly where the file will go.
The path to the file, before you save
File name, Folder and Subfolder are filled from the video: its title, a Clevera folder at the top of your OneDrive, and its collection. The preview on the right shows the full path, the length and the resolution of the MP4.
Clevera uses the Clevera folder if it already exists and creates it if not. Choose OneDrive to save at the top instead, or any of your top-level folders.
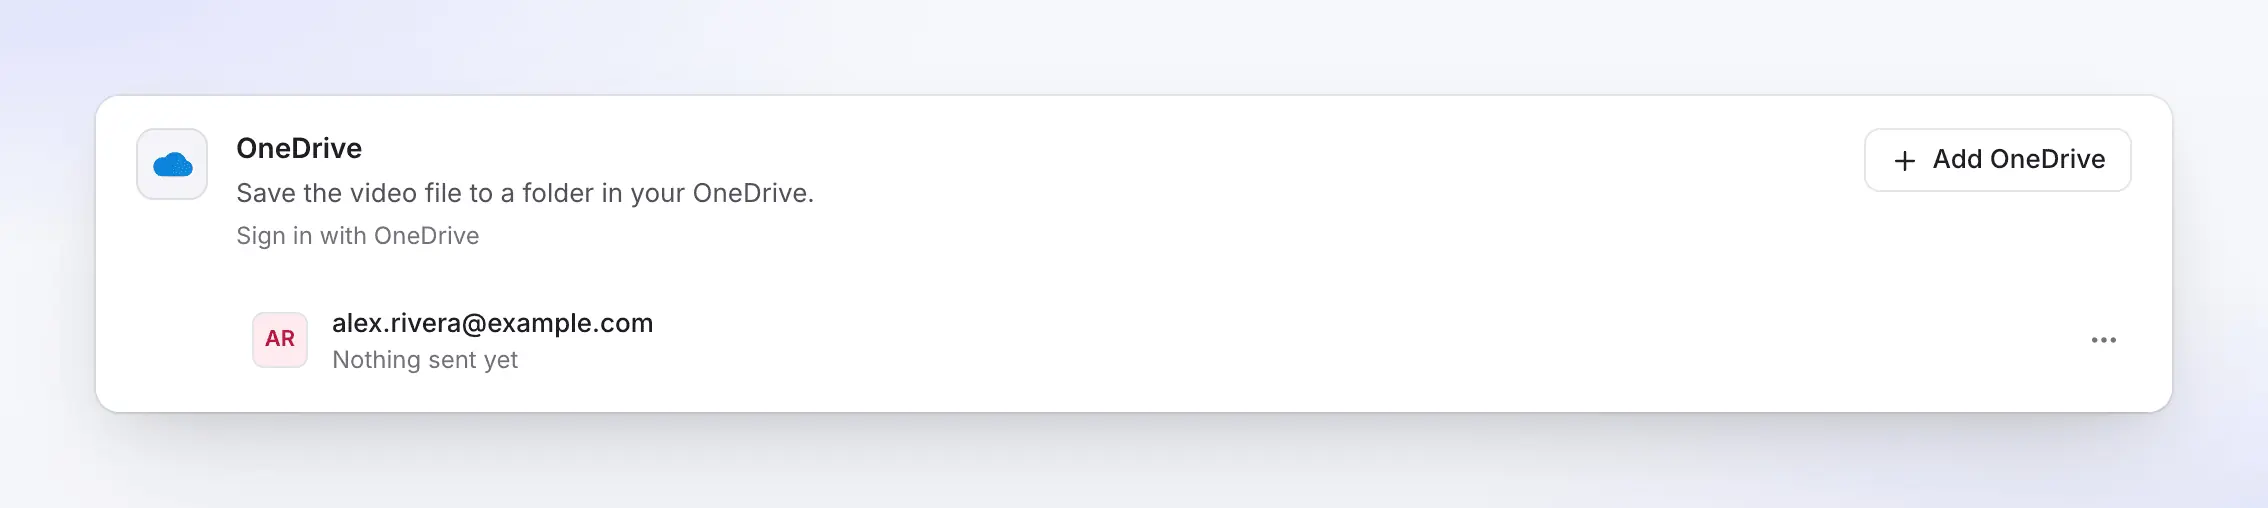
Connected once, for the whole workspace
The OneDrive card on the Integrations page lists each connected Microsoft account by its email address, with what it has received. Add a second account, such as a shared training account, with one click.
Connected accounts belong to the workspace, so colleagues who edit videos can save to them without signing in to Microsoft themselves.
Personal or work
Both kinds of Microsoft account
and what to expect from each.
Clevera connects through Microsoft’s own sign-in, so you choose the account on Microsoft’s page. Here’s what differs.
Work or school account
OneDrive for your organization
Saves into your own OneDrive for work or school. Some organizations only let IT approve new apps. If Microsoft shows Need admin approval, your Microsoft 365 admin approves Clevera once for the organization, and then you connect again.
The account needs a OneDrive. If it has never been opened, open OneDrive once with that account and then connect.
Personal account
OneDrive with an Outlook.com or Microsoft account
Works straight away: no admin approval is ever needed. Handy for freelancers and small teams who keep their videos in a personal OneDrive.
You can connect a personal and a work account to the same workspace. Each shows as its own row, so it’s always clear which OneDrive a video goes to.
Filled in for you
What Clevera fills in
and OneDrive’s rules it handles.
Saving a file needs no AI writing, so it uses no credits. Clevera fills the fields from the video and cleans the name up for OneDrive before sending.
- File nameSet for you
- The video’s title, in the language you’re sending, up to 251 characters (emoji count as two). OneDrive refuses
" * : < > ? / \ |, so Clevera replaces them, and it adds an underscore to reserved names such asCONordesktop.ini. - FolderYou choose
- Clevera by default, the top of your OneDrive, or one of your top-level folders. Remembered per account for the next video.
- SubfolderSet for you
- The video’s collection, found or created inside the folder. Clear it to save straight into the folder.
- Same nameHandled for you
- Nothing is replaced. If the name is taken, OneDrive keeps both and adds a number to the new file.
- Path lengthGood to know
- OneDrive limits a whole path, folders plus file name, to 400 characters. Keep folder names short if you nest deeply.
Setup
Set up the OneDrive integration
in about two minutes.
You need a Clevera workspace on the Pro or Custom plan, and a workspace owner or admin to connect the account. On a work account, have your Microsoft 365 admin at hand in case your organization requires approval.
- 1
Open Integrations
In Clevera, open Integrations from the sidebar. OneDrive is listed under Storage. - 2
Pick your Microsoft account
Click Connect and choose a personal or a work or school account. Microsoft lists what Clevera asks for: access to your own files, your basic profile, and staying signed in. - 3
Accept
Click Accept. If you see Need admin approval, ask your IT admin to approve Clevera for your organization, then connect again. - 4
Save a video
In a video, click Share, then Publish and Publish…. Tick the OneDrive account, check the path and click Save to OneDrive. - 5
Share it from OneDrive
When the row reads Saved to OneDrive, click Open in OneDrive and share the file or its folder with your colleagues.
OneDrive integration questions
Yes. Connect with your Microsoft work or school account and the video is saved to your own OneDrive for work or school. Personal Microsoft accounts work too.
Not directly. Clevera saves to your own OneDrive only; SharePoint sites, shared libraries and Teams channel files aren’t supported. Save to OneDrive, then share the file or folder with your team from there.
Your organization only lets administrators approve new apps. Ask your Microsoft 365 admin to approve Clevera for the organization, then connect again. The OneDrive guide explains what to send them, and support can provide a direct approval link.
Your own files, so it can create the Clevera folder, list your folders in the picker and upload the video. It doesn’t ask for other people’s files, SharePoint or your organization’s directory.
Yes. Click Add OneDrive on the Integrations page and pick the other account on Microsoft’s page. Tick one or both when you save a video.
Disconnect the account on Clevera’s Integrations page; files already saved stay in your OneDrive. Microsoft has no way for an app to give up its own access, so also remove Clevera from your connected apps: at account.live.com/consent/Manage for a personal account, or at myapps.microsoft.com for a work account.
OneDrive accepts files of up to 250 GB, much more than a rendered Clevera video. If your OneDrive is full, the save stops with a message, and Retry picks it up once you’ve made room.
Saving uses no credits, and rendering is free. Publishing to platforms and storage is part of the Pro and Custom plans; see pricing.
Your next training video, already in OneDrive.
Record the walkthrough once. Clevera turns it into a narrated video and saves the MP4 where your Microsoft 365 colleagues will find it.