GitHub integration
Turn screen recordings into Markdown docs on GitHub
Record a workflow once. Clevera writes the step-by-step guide with screenshots, and publishes it to the GitHub repository and folder you pick as a Markdown file, images included, in a single commit.
GitHub-flavored Markdown
Screenshots in your repo
One commit per publish
Works with Docusaurus and MkDocs
What you can do
Docs that live next to the code,
without anyone writing them by hand.
Engineering teams keep their docs in Git because that’s where reviews, history and builds already happen. Clevera fills that folder with clear, illustrated guides, so the docs keep pace with the product.
Document a feature in minutes
Walk through the feature once on screen. Clevera turns the recording into a written guide with numbered steps and screenshots, ready for your repository.
Keep docs in your normal Git flow
Every publish is a regular commit on your default branch, so your docs site rebuilds, your history stays readable and every change can be traced.
Screenshots that never break
Images are committed into your repository next to the Markdown file. They keep working without Clevera, and a private repo keeps them private.
Update a guide, not a pile of files
Changed the UI? Fix the article in Clevera and publish again. The same file and its images are updated in a new commit, with no duplicates.
Docs in every language you support
Translate the article in Clevera, switch the language and publish each version to its own folder, such as docs/de or docs/ja.
Access you control
Clevera only sees the repositories you install its GitHub App on, and it can only read and write their contents.
How it works
From recording to repository
in four steps.
Connect GitHub once. After that, every article is a click away from your repo.
- 1
Connect GitHub
Authorize the Clevera AI app and install it on the repositories you want to publish to. - 2
Clevera writes the guide
From your screen recording, Clevera writes the help article: headings, numbered steps and screenshots. - 3
Pick the repo and publish
In Share, open Publish, choose the repository and folder, and click Publish to GitHub. - 4
It lands in your repo
The Markdown file and its images arrive in one commit on the default branch, ready for your docs build.
See it in Clevera
Publishing to GitHub,
from the article’s Share window.
There’s no export, no copy and paste and no image uploads by hand. The same Share window that gives you a link and an embed code also publishes to GitHub.
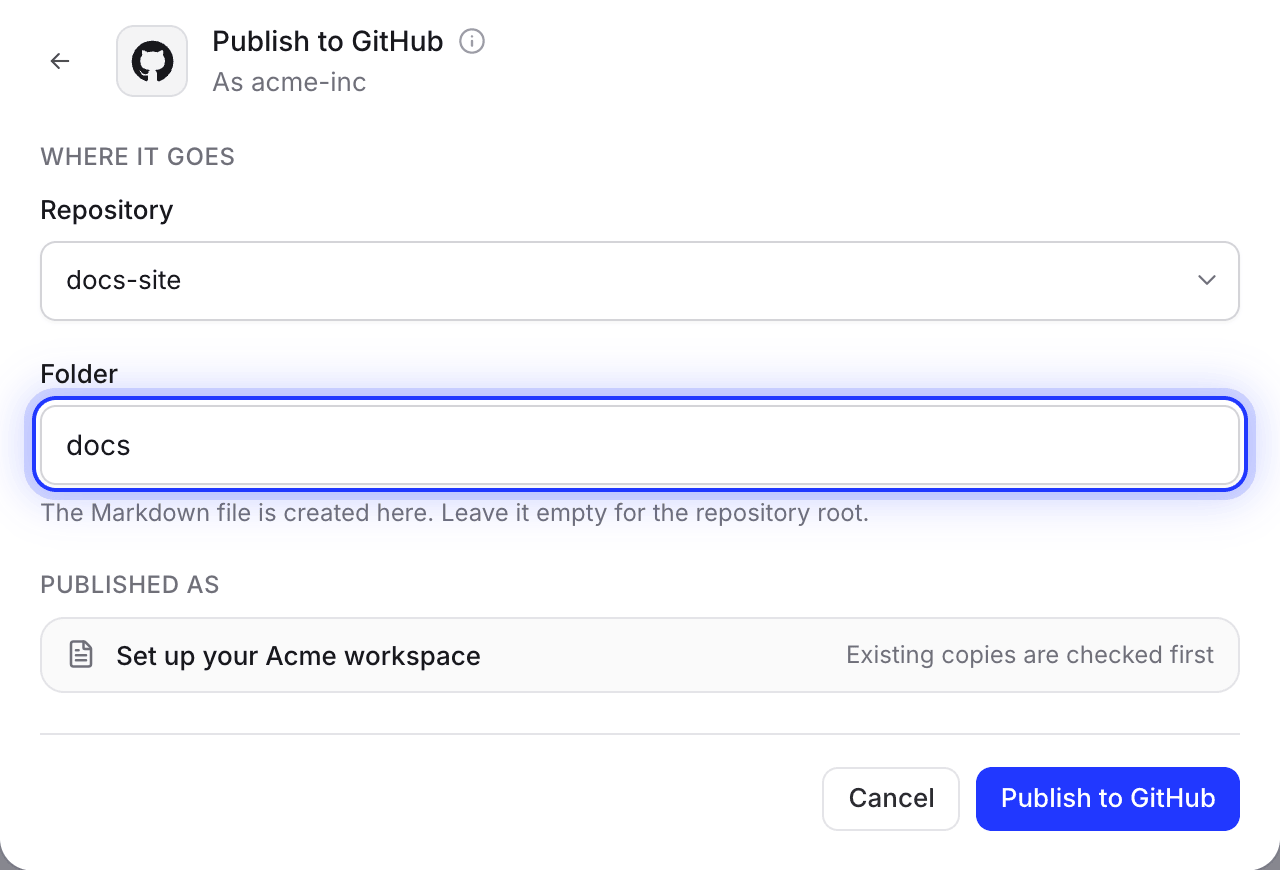
Choose the repository and the folder
Pick any repository the app is installed on and type a folder, such as docs or content/guides. Folders that don’t exist yet are created, and Clevera remembers your choice for next time.
The file is named after the article’s title, so the URL on your docs site reads well too.
Update the file that’s already there
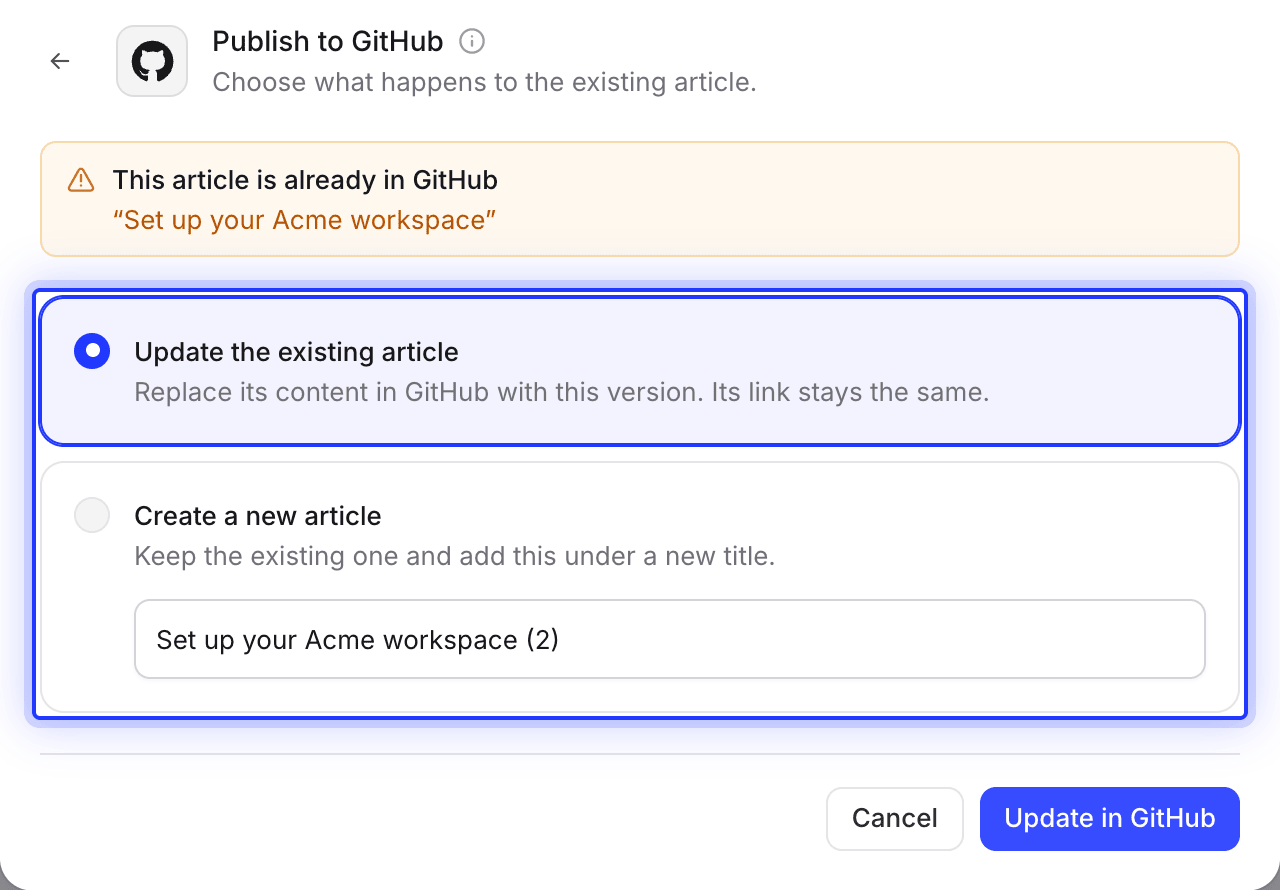
Publish the same article to the same folder again and Clevera spots the existing file. Update it in a new commit, or keep it and add the new version under a new title.
Changes only flow from Clevera to GitHub, so an edit in the repo never overwrites your article.
GitHub, and the rest of your docs stack
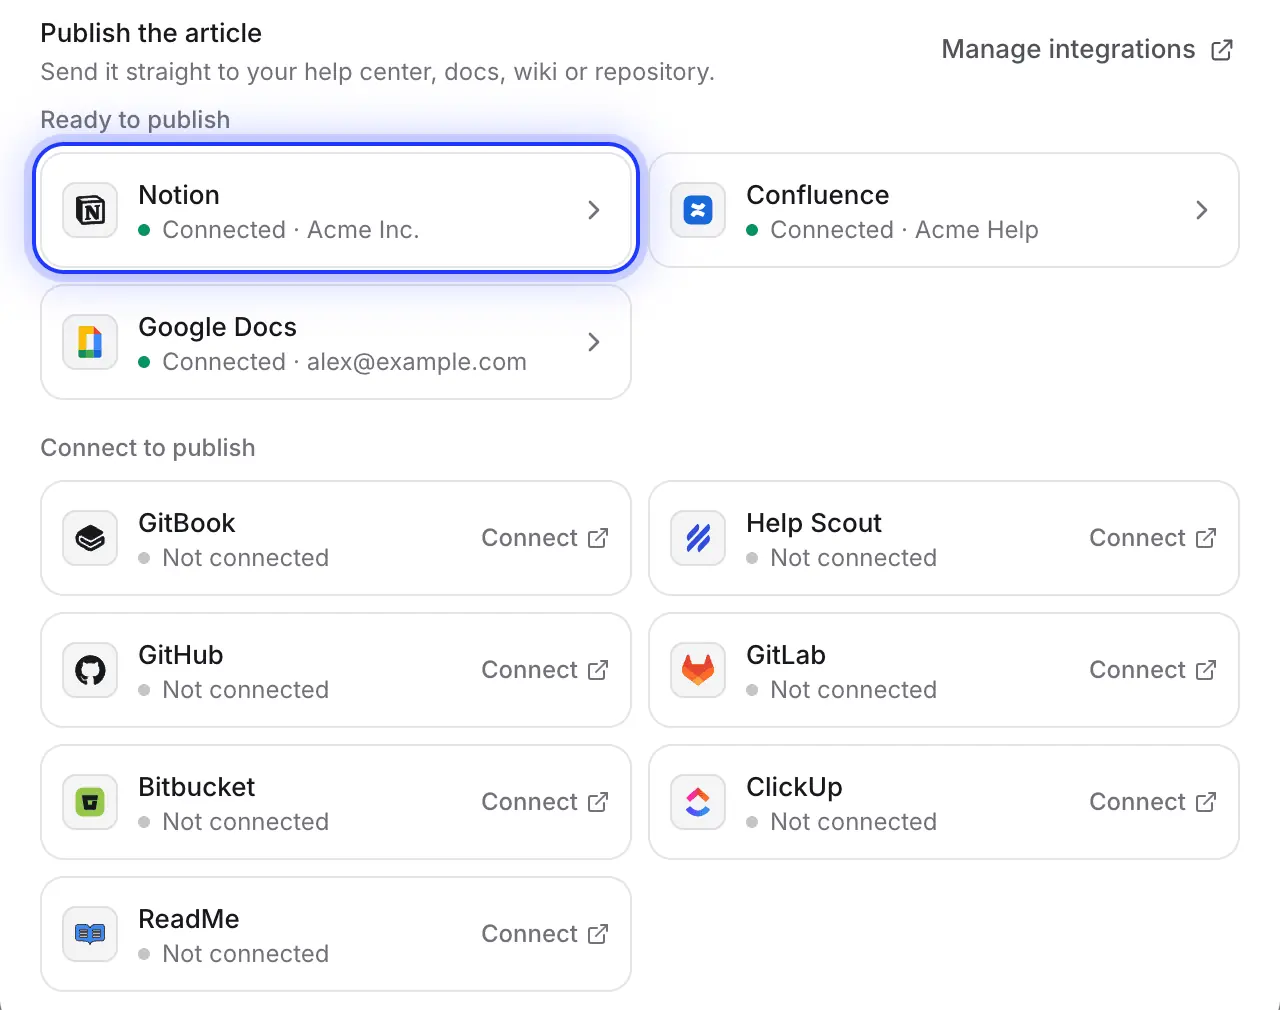
GitHub sits next to GitLab, Bitbucket, Notion, Confluence, Google Docs, GitBook, Help Scout, ReadMe and ClickUp in the same Publish tab. Connect the ones your team uses and publish the same article to each.
Filled in for you
What lands in your repository
and what you decide.
Clevera writes GitHub-flavored Markdown that renders well on GitHub and in static-site generators. Here is exactly what each publish contains.
- Repository and folderYou choose
- Any repository the Clevera AI app is installed on, and any folder in it. The folder starts as
docs; leave it empty for the repository root. - File nameSet for you
- The article’s title in lowercase with hyphens, ending in
.md. “Create your first invoice” becomescreate-your-first-invoice.md. Titles in other scripts are spelled in Latin letters. - Front matterSet for you
- A short YAML block with
title,created_at,updated_atandsource, which Docusaurus, MkDocs, Jekyll and Hugo read. - FormattingConverted for you
- Numbered steps, tables, task lists and fenced code blocks with their language. Callouts become GitHub alerts such as
[!NOTE]and[!WARNING]; toggles become collapsible sections. - ScreenshotsSet for you
- Committed to
assets/<file name>/in the same folder, linked by relative path, with their captions. - CommitSet for you
- One commit on the default branch, with the message “Add article: …” or “Update article: …”, authored by the GitHub account that connected Clevera.
- VideosSet for you
- A video placed in the article becomes a thumbnail that links to its player, since Markdown files can’t play video.
Setup
Set up the GitHub integration
in about two minutes.
You need a Clevera workspace on Pro or above. The workspace owner or an Administrator connects GitHub once; after that, anyone who can edit an article can publish it. Publishing uses no credits.
- 1
Open Integrations
In Clevera, open the workspace menu, choose Integrations and click Connect on the GitHub card. - 2
Authorize the Clevera AI app
GitHub asks you to authorize Clevera AI. Click Authorize. - 3
Install it on your repositories
Pick your account or organization, then All repositories or Only select repositories. The app asks for Contents read and write, and Metadata read-only. - 4
Publish an article
In the article editor, click Share, open Publish, click the GitHub tile, choose the repository and folder, and click Publish to GitHub. - 5
Open it on GitHub
When you see “Published to GitHub.”, click Open in GitHub to see the file.
GitHub integration questions
No. Clevera commits straight to the repository’s default branch, usually main. If branch protection requires pull requests or reviews, GitHub refuses the commit; allow it for the connected account, or publish to a repository without that rule.
Yes. Clevera can publish to any repository the Clevera AI app is installed on, public or private. The screenshots are committed into the repository, so they’re as private as the rest of it.
Yes. Point the folder at the one your docs site builds from. These generators read the title in the front matter, and your normal build picks up the new commit. Check that your theme renders GitHub alerts and collapsible sections.
Nothing changes on GitHub until you publish again. Then Clevera finds the existing file and lets you update it in a new commit. If you renamed the article, the new title becomes a new file, and you can delete the old one on GitHub. Clevera never deletes files from your repository.
Contents read and write, to create and update the Markdown file and its images, and Metadata read-only, which GitHub requires to list repositories. Nothing else. You choose which repositories the app can see.
Publishing to GitHub is part of the Pro and Custom plans, and publishing uses no credits. Making the article itself uses credits as usual. See pricing.
Your next guide, already in the repo.
Record it once. Clevera writes the guide and commits it, screenshots and all.