Bitbucket integration
Publish screen recording guides to Bitbucket as Markdown
For teams that live in the Atlassian stack. Record a workflow once, and Clevera writes the guide and commits it to your Bitbucket Cloud repository as a Markdown file, screenshots included, ready for the README, the docs folder or your docs site.
Bitbucket Cloud
Markdown Bitbucket can display
Screenshots in the repository
Pairs with Confluence
What you can do
Developer docs for Atlassian teams,
written from what you show on screen.
Engineering runs on Jira and Bitbucket, the rest of the company reads Confluence, and the how-to guides fall through the gap. Clevera closes it: the same recording becomes a Markdown guide in the repository and, if you like, a page in your Confluence space.
Turn a demo into a guide
Record the setup steps, the release checklist or the new feature. Clevera writes the guide with numbered steps and screenshots, so nobody has to type it up after the sprint.
Markdown Bitbucket can show
Bitbucket’s file view doesn’t render raw HTML, so Clevera writes plain Markdown without it. The guide reads cleanly in the repository, not just on a docs site.
Screenshots in the same commit
Images are committed next to the Markdown file and linked by relative path. They work without Clevera and stay as private as the repository.
Fits Bitbucket Pipelines
A publish is an ordinary commit on the main branch. If Pipelines builds your docs site from the repository, it runs on the new guide like any other change.
One recording, two Atlassian homes
Publish the article to a Bitbucket repository for developers and to a Confluence space for everyone else, from the same Share window.
Re-publish, don’t duplicate
When the UI changes, update the article and publish again. Clevera finds the existing file and overwrites it in a new commit.
How it works
From recording to repository
in four steps.
An owner or admin connects Bitbucket once. Then anyone who can edit an article publishes it from the editor.
- 1
Connect Bitbucket Cloud
Sign in to bitbucket.org and grant Clevera access to read your account and read and write repositories. - 2
Clevera writes the guide
From the screen recording, Clevera writes the article: headings, numbered steps, callouts and screenshots. - 3
Pick repository and folder
In Share, open Publish, choose the repository and a folder such as docs, and click Publish to Bitbucket. - 4
It lands on main
The Markdown file and its images arrive in one commit on the repository’s main branch.
See it in Clevera
Publishing to Bitbucket,
from the article’s Share window.
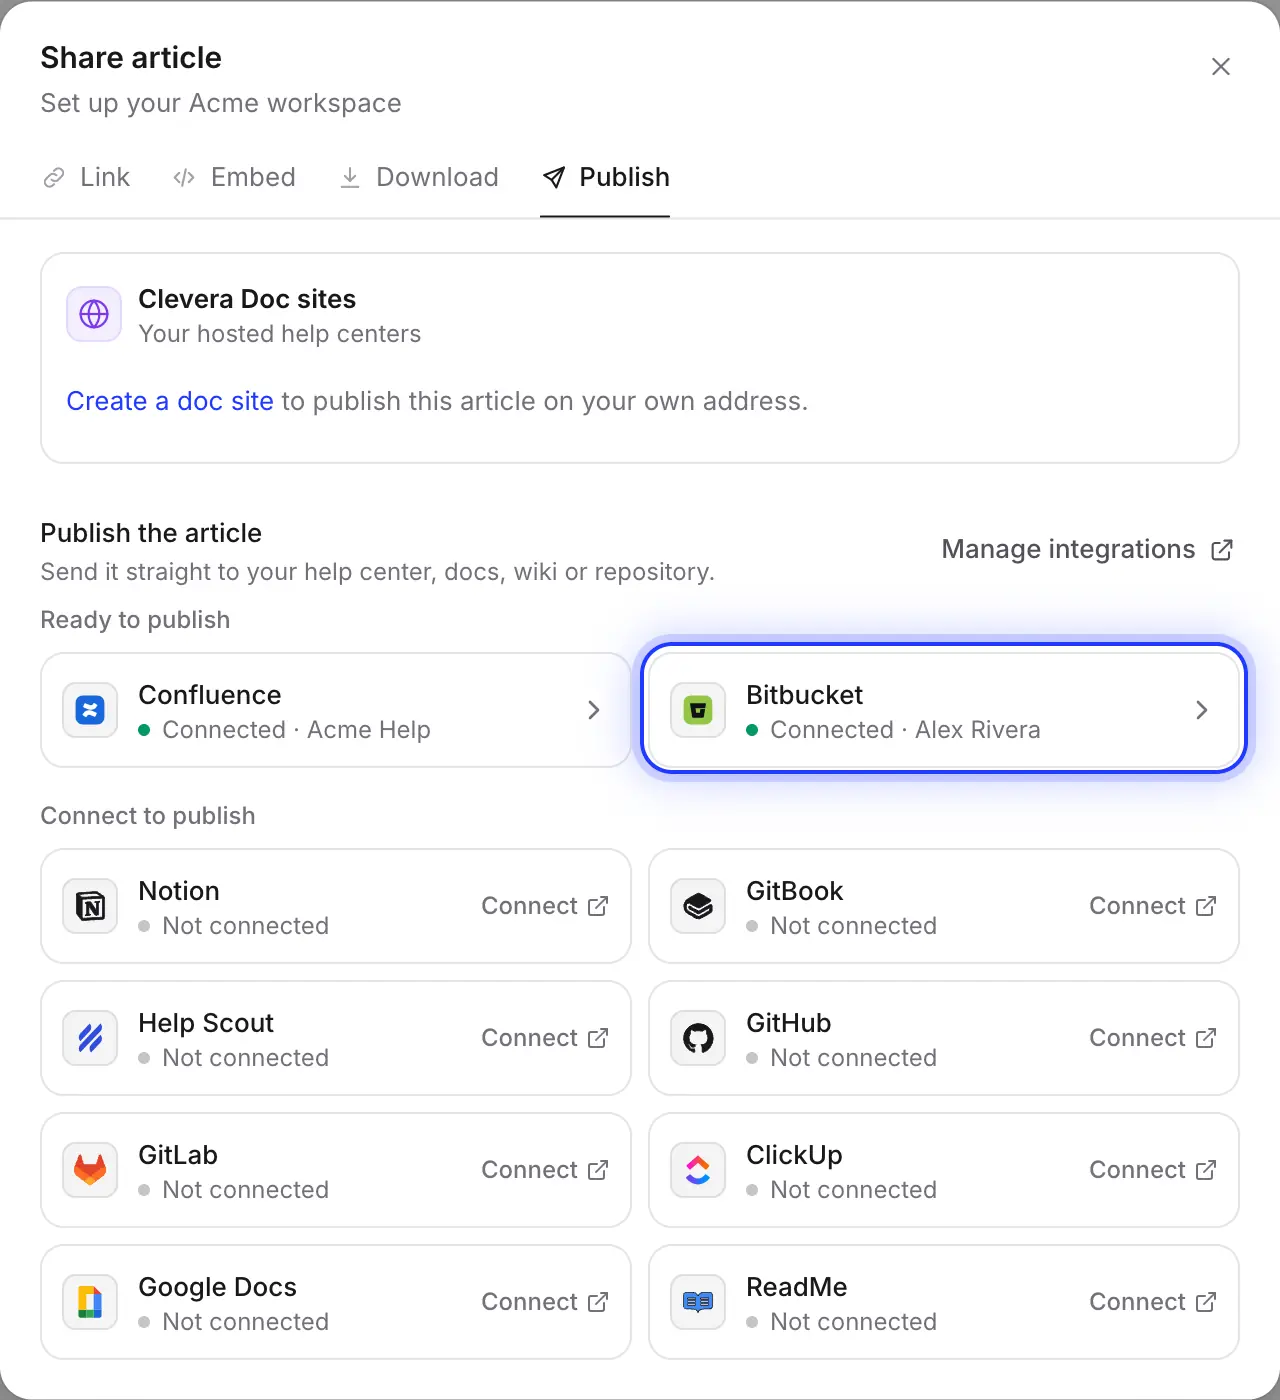
Every article has a Share window with a link, an embed code, downloads and a Publish tab. Bitbucket is one tile in that tab.
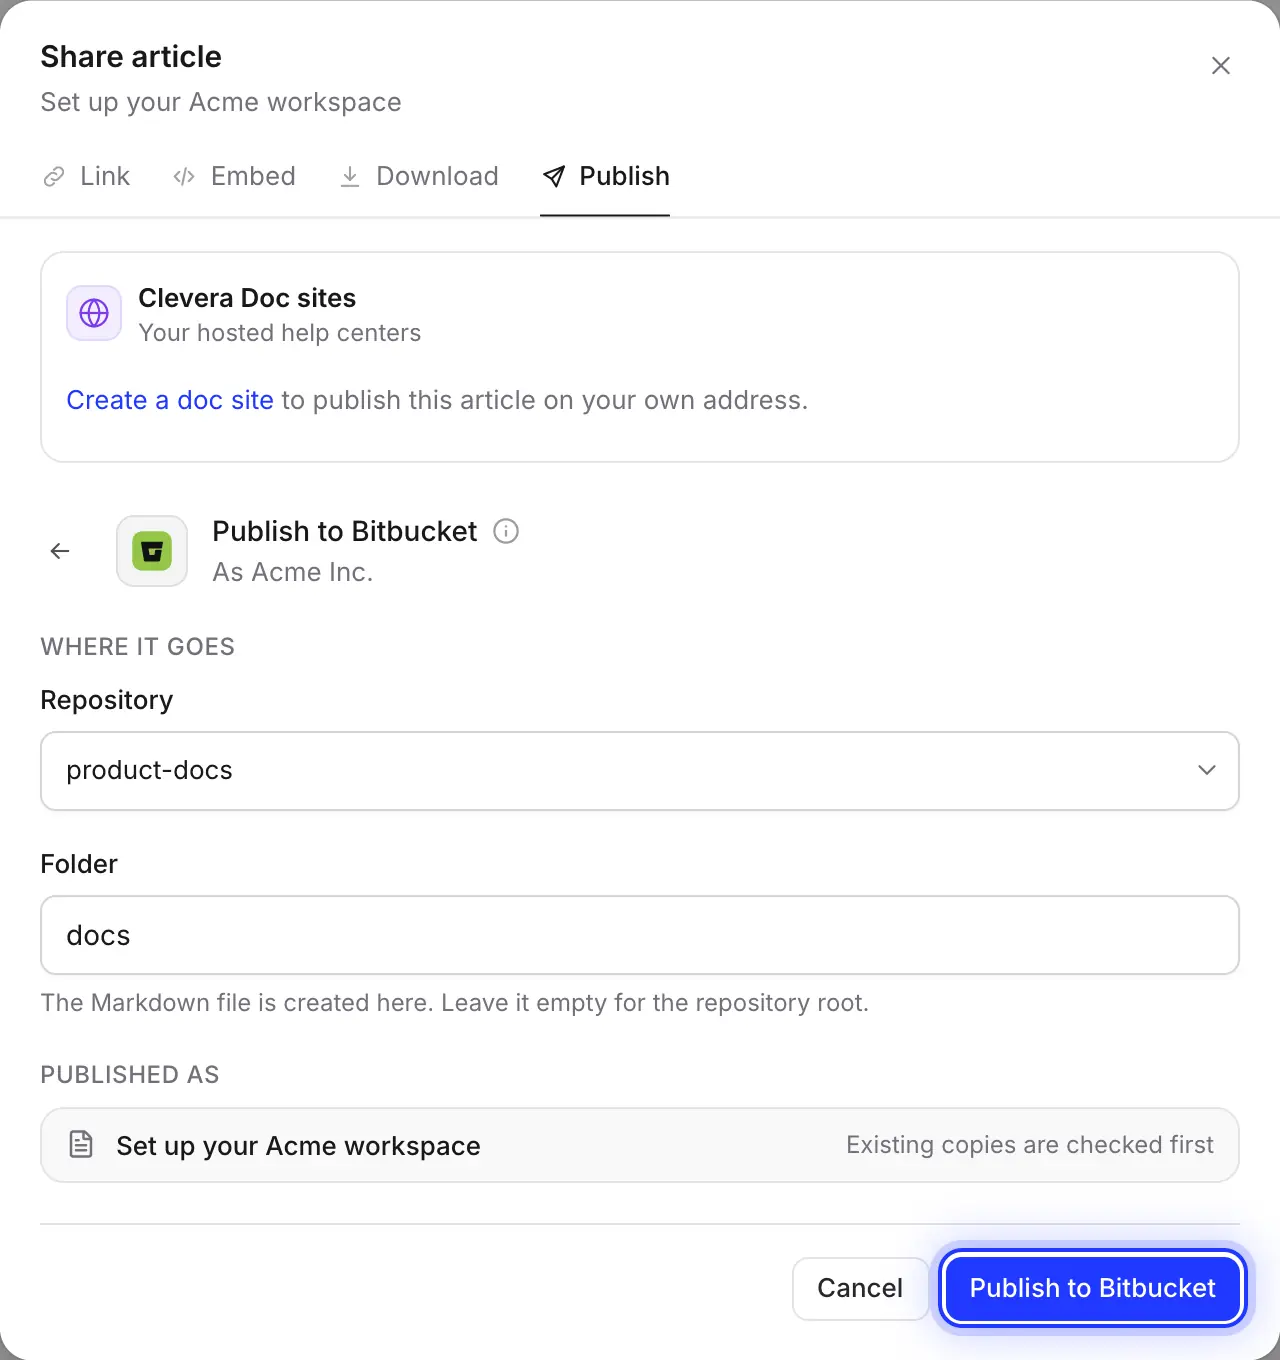
Choose the repository and the folder
The list holds the repositories the connected account can contribute to, across all of its Bitbucket workspaces, most recently updated first. Type a folder such as docs; Clevera creates it if it isn’t there yet.
Your choice is remembered, so publishing the next guide is two clicks.
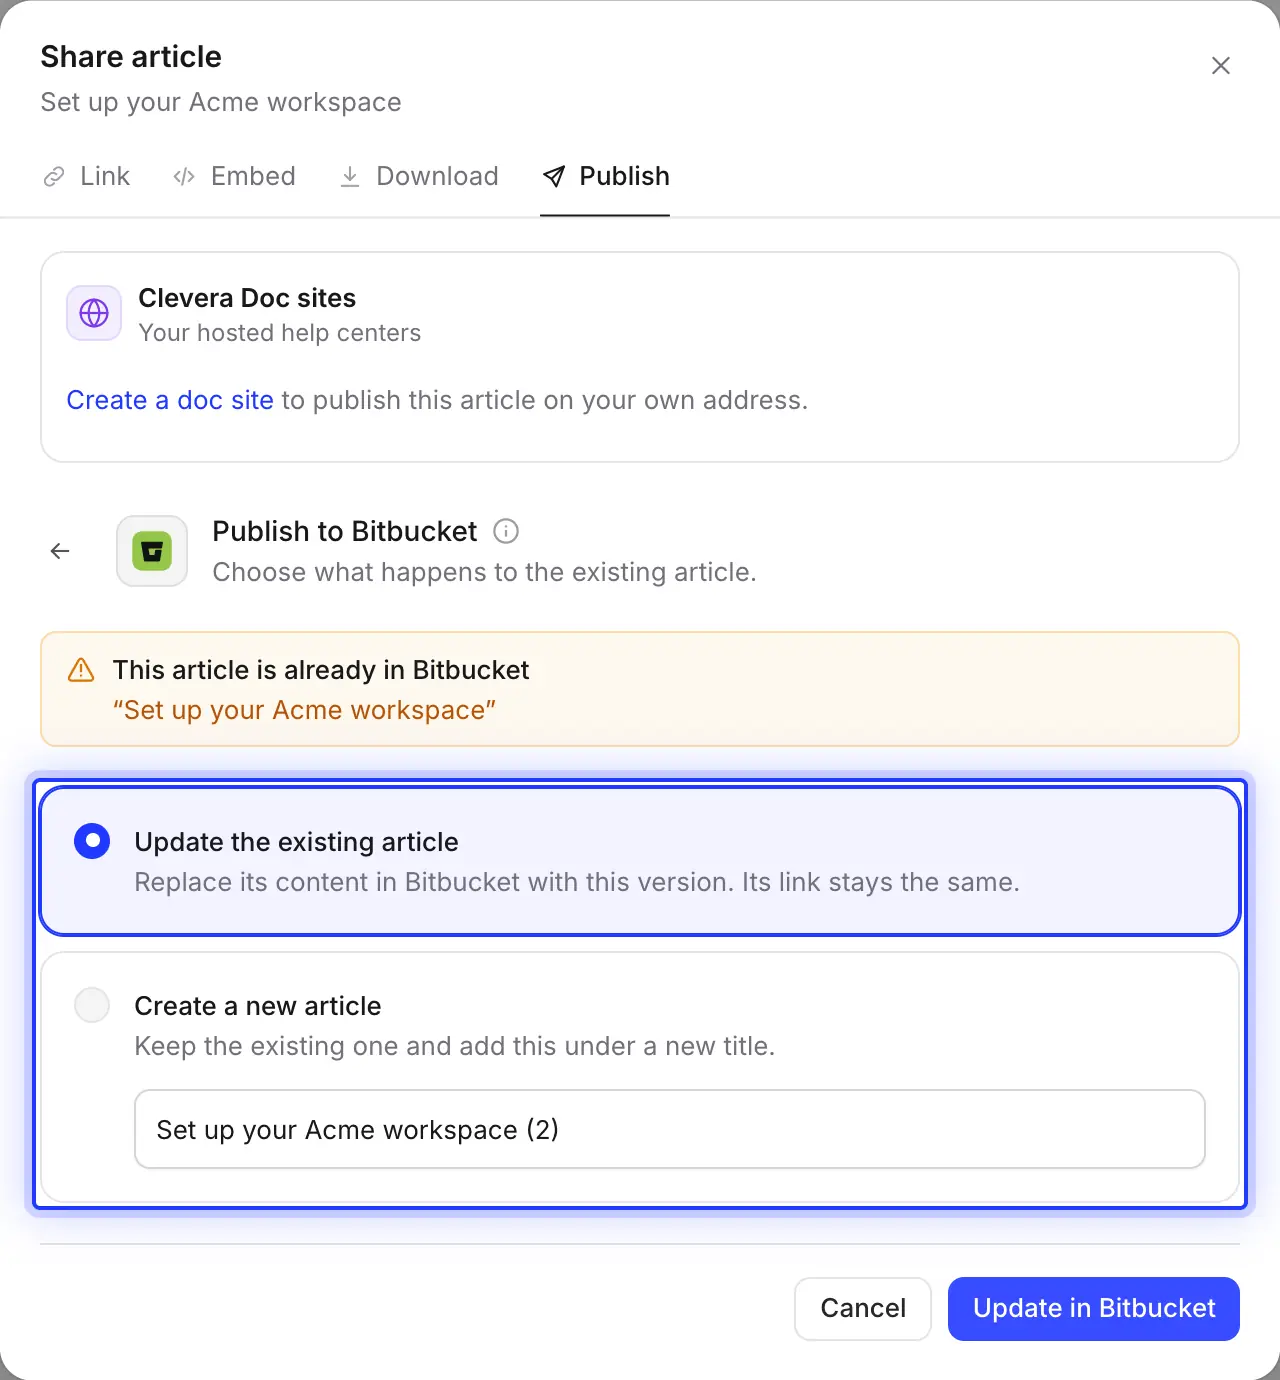
Update the file that’s already there
Clevera checks the folder for a file with the same name before it writes. Update it, and the same file and its images are overwritten in a commit called “Update article: …”. Or keep it and add this version as a new file under a new title.
Edits made in Bitbucket never come back to Clevera, so publishing only ever moves one way.
Bitbucket and Confluence, side by side
Connect Confluence too and the same article goes to a space as a Confluence page, with its screenshots attached. Developers read it next to the code; support and sales read it in the wiki.
Filled in for you
What lands in the repository
and how it reads in Bitbucket.
Bitbucket shows Markdown a little differently from GitHub and GitLab. Clevera writes for Bitbucket specifically, so nothing turns into stray tags.
- Repository and folderYou choose
- Any repository the connected account can contribute to, with write access to the main branch. The folder starts as
docs; leave it empty for the repository root. - File nameSet for you
- The title in lowercase with hyphens, ending in
.md: “Deploy to staging” becomesdeploy-to-staging.md. Accented and non-Latin titles are spelled in Latin letters first. - CalloutsConverted for you
- A quote that opens with an emoji and the callout’s title in bold: ℹ️ info, 💡 tip, ⚠️ warning, 📝 note, ✅ success, 🚨 danger. It reads the same in Bitbucket’s viewer as on a docs site.
- Toggles and mathConverted for you
- Without raw HTML there are no collapsible sections, so a toggle becomes its summary in bold with the content open below. Equations become
mathcode blocks, since Bitbucket doesn’t render math. - ScreenshotsSet for you
- Committed to
assets/<file name>/next to the file in the same commit, with their captions in italics. - Front matter and commitSet for you
- A short YAML block with
title,created_at,updated_atandsource. The commit message is “Add article: …” or “Update article: …”, by the account that connected Clevera.
Setup
Set up the Bitbucket integration
in about two minutes.
You need a Clevera workspace on Pro or Custom and a Bitbucket Cloud account. The workspace owner or an Administrator connects it; after that, anyone who can edit an article can publish it. Publishing uses no credits.
- 1
Open Integrations
In Clevera, open the workspace menu, choose Integrations, find Bitbucket under Code repositories and click Connect. - 2
Grant access in Bitbucket
Bitbucket asks you to let Clevera read your account and read and write repositories. Click Grant access. - 3
Check the branch rules
If the main branch has a branch restriction, add the connected account to the people who can write to it under Repository settings → Branch restrictions. - 4
Publish an article
In the editor, click Share, open Publish, click the Bitbucket tile, choose the repository and folder, and click Publish to Bitbucket. - 5
Open it in Bitbucket
When you see “Published to Bitbucket.”, click Open in Bitbucket to see the file.
Bitbucket integration questions
No. Clevera connects to Bitbucket Cloud (bitbucket.org) only. Bitbucket Data Center and Server aren’t supported.
No. It commits straight to the repository’s main branch, usually main or master, and you can’t choose another branch. If a branch restriction allows changes only through pull requests, Bitbucket refuses the commit.
The connected account can’t write to the main branch, usually because of a branch restriction. Give it write access under Repository settings → Branch restrictions, or publish to another repository.
No. Clevera publishes the article to Bitbucket as a Markdown file; it doesn’t create or update Jira issues. You can paste the file’s link into an issue yourself, or publish the same article to Confluence.
Callouts come through as quotes with an emoji and a bold title, which Bitbucket shows well. Checklists are written as Markdown task lists; Bitbucket may show the boxes as text. Highlights and superscript become plain text.
Nothing changes in Bitbucket until you publish again. Then you can overwrite the existing file in a new commit. A renamed article becomes a new file; delete the old one in Bitbucket yourself, since Clevera never deletes files.
Publishing to Bitbucket is part of the Pro and Custom plans and uses no credits. Making the article uses credits as usual. See pricing.
Show it once. Find it in Bitbucket.
Clevera writes the guide from your recording and commits it to the repository, screenshots included.