Help Scout integration
Turn screen recordings into Help Scout Docs articles
Record the answer to a support question once. Clevera writes the help article with screenshots and publishes it to the Help Scout Docs site and collection you pick, live for customers the moment it lands.
Live in your knowledge base
Screenshots stored in Help Scout
Tutorial videos play in the article
Update without duplicates
What you can do
Answer the ticket once,
then let the knowledge base answer it again.
Support teams on Help Scout know which questions come back every week. Writing the article is the part that never gets done. With Clevera, the agent who knows the answer records it on screen, and the article is in Help Scout Docs a few minutes later.
Turn repeat tickets into articles
Record yourself solving the problem in your product. Clevera writes a customer-ready article with numbered steps and a screenshot for each one.
Found where customers look
It’s an ordinary Docs article, so it shows up on your Docs site and in its search, and in Beacon when your Beacon answers from that site.
Watch or read, in one article
Place a Clevera video or a YouTube video in the article and it plays right inside the Help Scout article, next to the written steps.
Screenshots Help Scout keeps
Images are uploaded to Help Scout and stored there, so the article keeps working without Clevera.
Fix it when the product changes
Re-record, update the article in Clevera and publish again. Clevera replaces the existing article and its address stays the same.
Live in one click
Articles are published with Help Scout’s Published status, so customers can read them immediately. Use a private collection when you want a review first.
How it works
From recording to Help Scout Docs
in four steps.
Paste your Docs API key once. After that, any article in the workspace is one click from your knowledge base.
- 1
Connect Help Scout
Paste your Docs API key into Clevera, let it check the key, and pick the Docs sites to publish to. - 2
Clevera writes the article
From your screen recording, Clevera writes the help article: steps, screenshots, tips and warnings. - 3
Pick the site and collection
In Share, open Publish, choose the Docs site and collection, and click Publish to Help Scout. - 4
It’s live for customers
The article lands in the collection with Help Scout’s Published status, ready for readers.
See it in Clevera
Publishing to Help Scout,
from the article’s Share window.
No copying text into the Docs editor, no re-uploading screenshots one by one, no rebuilding callouts by hand. Connect once, then publish from Share.
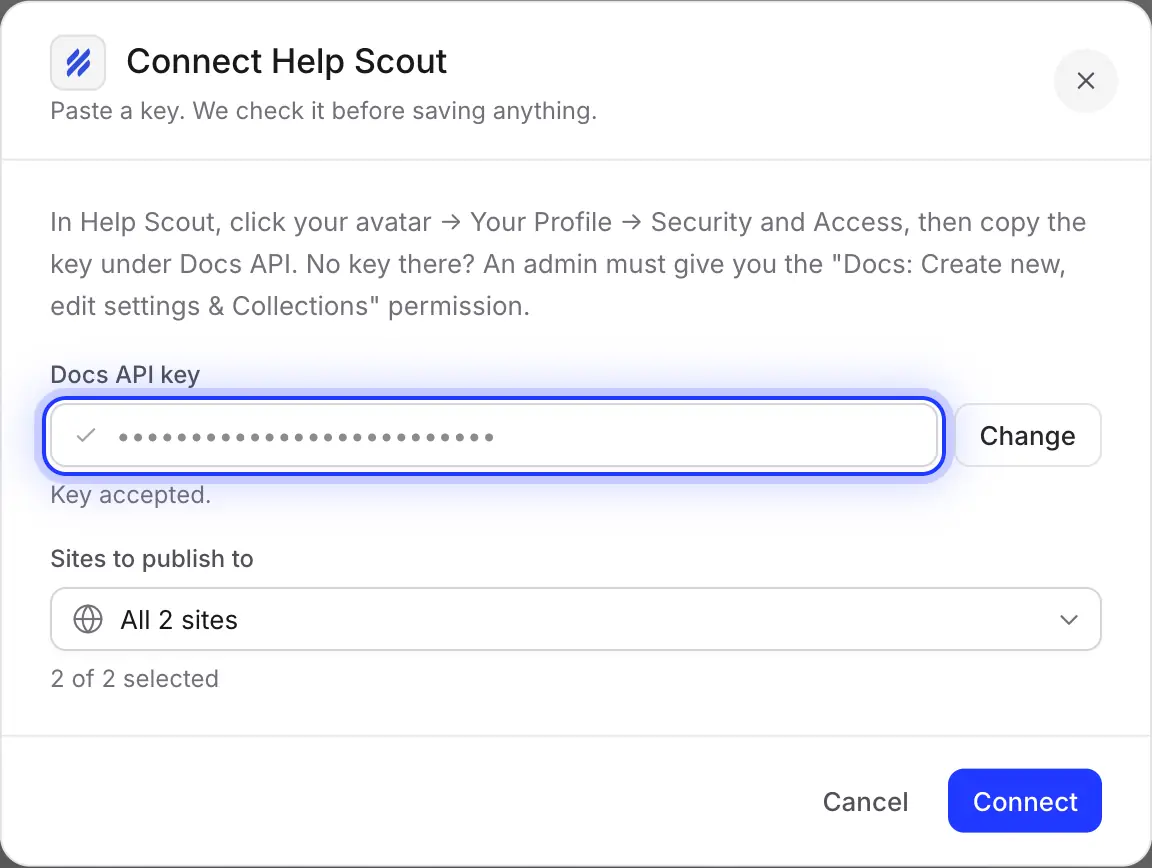
Connect with your Docs API key
In Help Scout, click your avatar, open Your Profile → Security and Access and copy the key under Docs API. Paste it into Clevera and click Check key; nothing is saved until Help Scout accepts it.
No key there? A Help Scout admin needs to give you the “Docs: Create new, edit settings & Collections” permission first.
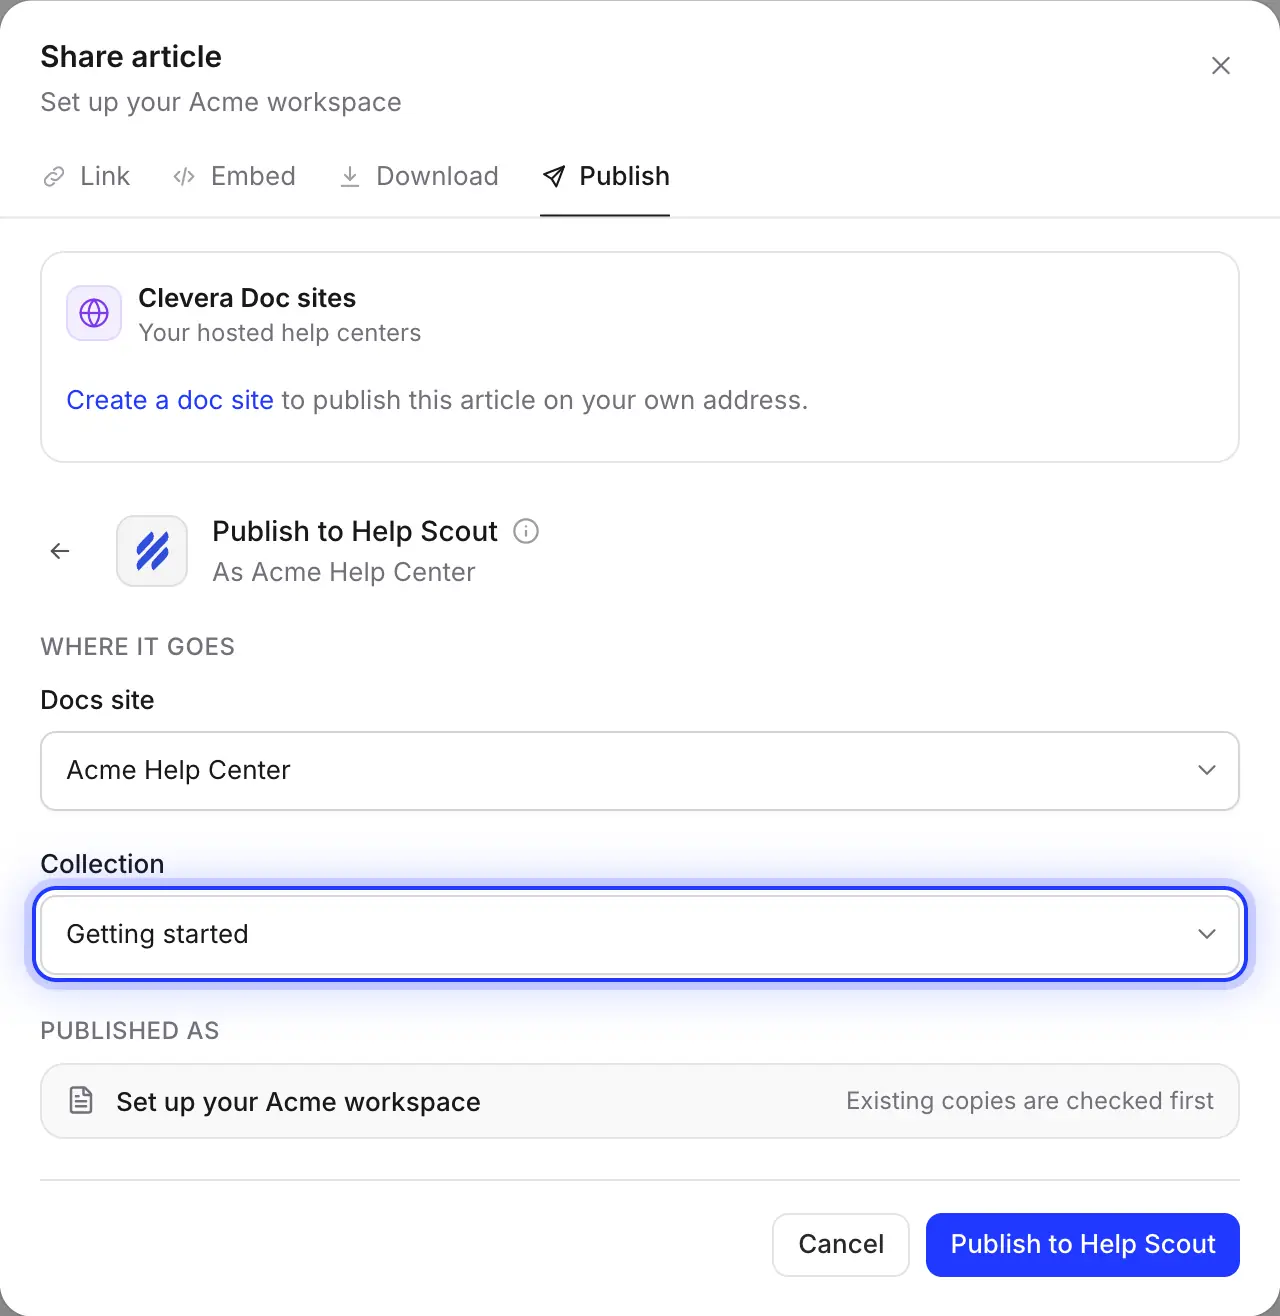
Choose the Docs site and the collection
Pick the Docs site, then one of its collections, such as Getting started or Billing. Clevera remembers your choice for next time.
Clevera checks the collection for an article with the same title first, so publishing again offers an update instead of creating a duplicate.
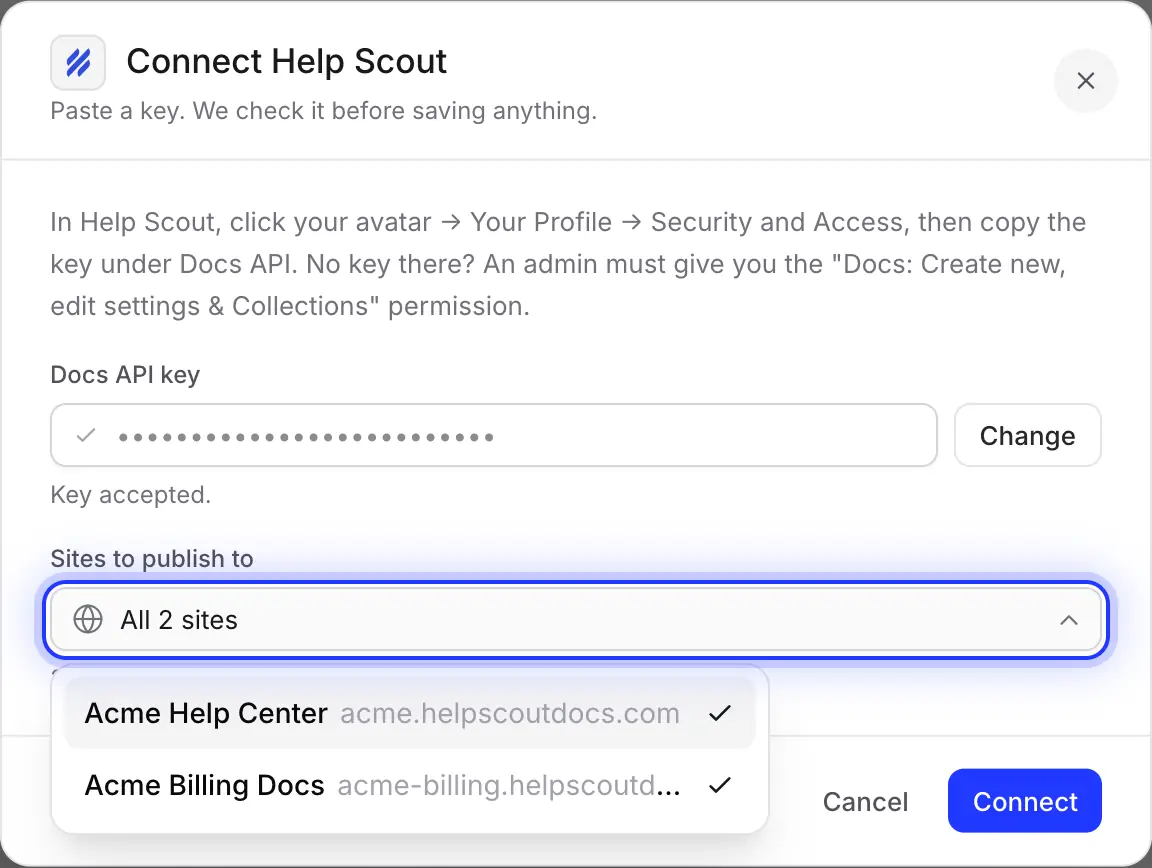
Only the sites you allow
The Docs API key reaches every site its user can edit. When you connect, untick the sites your team shouldn’t publish to, such as an internal knowledge base. At least one stays selected.
Filled in for you
What lands in your knowledge base
and what you decide.
Clevera converts the article into Help Scout’s article format, so it reads like the rest of your Docs and can be edited in Help Scout as usual.
- Docs site and collectionYou choose
- Any collection in the Docs sites you allowed. Categories inside a collection aren’t set; add the article to one in Help Scout afterwards.
- TitleSet for you
- The article’s title, in the language you have open in the editor. Switch language first to publish a translation.
- StatusSet for you
- Published. If the collection is public, readers can see the article right away.
- CalloutsConverted for you
- Tinted boxes with an icon and the callout title in bold: blue for info, yellow for warnings, green for tips and success, gray for notes and red for danger.
- Steps, tabs and togglesConverted for you
- Numbered steps become a numbered list with each step’s title as a heading. Each tab becomes a heading with its content below, and toggles become collapsible sections.
- ScreenshotsSet for you
- Uploaded into Help Scout and stored there. If an upload fails, the image links to a Clevera copy that doesn’t expire.
- VideosSet for you
- YouTube and Clevera videos placed in the article become embedded players; a Clevera video needs its share link on. Video files become a link. The video the article came from isn’t added.
Setup
Set up the Help Scout integration
in about two minutes.
You need a Clevera workspace on Pro or above, and a Help Scout Docs site with at least one collection. The workspace owner or an Administrator connects Help Scout once; after that, anyone who can edit an article can publish it. Publishing uses no credits.
- 1
Copy your Docs API key
In Help Scout, click your avatar, open Your Profile → Security and Access and copy the key under Docs API. Treat it like a password. - 2
Connect Help Scout in Clevera
Open the workspace menu, choose Integrations, find Help Scout under Knowledge bases and click Connect. Paste the key and click Check key. - 3
Pick the sites
Under Sites to publish to, keep the Docs sites your team may publish to and click Connect. - 4
Publish an article
In the article editor, click Share, open Publish, click the Help Scout tile, choose the Docs site and Collection, and click Publish to Help Scout. - 5
Open it in Help Scout
When you see “Published to Help Scout.”, click Open in Help Scout to see the article.
Help Scout integration questions
Right away. Clevera publishes with Help Scout’s Published status, not as a draft, so a public collection shows it to readers immediately. To review first, publish to a private collection and move the article once it’s ready.
It’s a normal Help Scout Docs article, so it behaves like the rest of your knowledge base. If your Beacon shows answers from that Docs site and collection, customers can find it there too. Beacon settings stay in Help Scout.
If the collection already has an article with that title, Clevera shows “This article is already in Help Scout.” Update it to replace its title and text while its address stays the same, or create a new article under a new title. Publishing to a different collection creates a new article there.
No. Publishing goes one way, and an update overwrites the article’s text in Help Scout. Make changes in Clevera and publish again. Clevera never deletes articles from Help Scout.
Clevera places it in the collection you pick, not in a category inside it. Add it to a category in Help Scout after publishing.
Yes, that’s a separate, free feature. See the Help Scout Docs import and how Clevera compares with Help Scout. This integration is for teams who keep their knowledge base in Help Scout.
Publishing to Help Scout is part of Clevera’s Pro and Custom plans and uses no credits; making the article uses credits as usual. See pricing.
The next repeat ticket, answered in your Docs.
Record the answer once. Clevera writes the article and publishes it to Help Scout, screenshots and all.