Google Docs integration
Turn screen recordings into Google Docs your team can review
Record a process once. Clevera writes the step-by-step guide with screenshots and publishes it as a new Google Doc in My Drive, formatted with real headings, lists and tables, ready to share, comment on and hand over.
Real Google Docs formatting
Screenshots copied into the doc
Personal and Workspace accounts
Can’t see the rest of your Drive
What you can do
Guides that start where your team already works,
in a doc they can comment on.
Plenty of teams don’t have a wiki or a docs site. They have Google Drive: SOPs, onboarding notes, client handovers and review drafts, all as Google Docs. Clevera writes those documents for you from a screen recording.
A written SOP from one recording
Walk through the process on screen once. Clevera turns it into a guide with numbered steps and a screenshot for each one, and creates it as a Google Doc.
Review it the Google way
The result is an ordinary Google Doc. Share it, leave comments, switch to suggesting mode and let a subject-matter expert sign off before the process goes out.
Screenshots that live in the doc
Google copies every screenshot into the document itself, so the images keep working when you share the doc, print it or delete the article in Clevera.
Client handovers in minutes
Agencies and consultants record the setup they built, publish it, and share a clean, branded-by-you document with the client from Drive.
A doc per language
Translate the article in Clevera, switch to the language in the editor and publish again. Each language becomes its own Google Doc.
The smallest access Google offers
Clevera can create documents and open only the ones it made. It can’t list, read or change anything else in your Drive.
How it works
From recording to Google Doc
in four steps.
Connect a Google account once. After that, any article in the workspace is one click from becoming a document.
- 1
Connect Google Docs
Sign in with the Google account whose My Drive should hold the documents, and allow access. - 2
Clevera writes the guide
From your screen recording, Clevera writes the article: a title, short intro, numbered steps and screenshots. - 3
Publish from Share
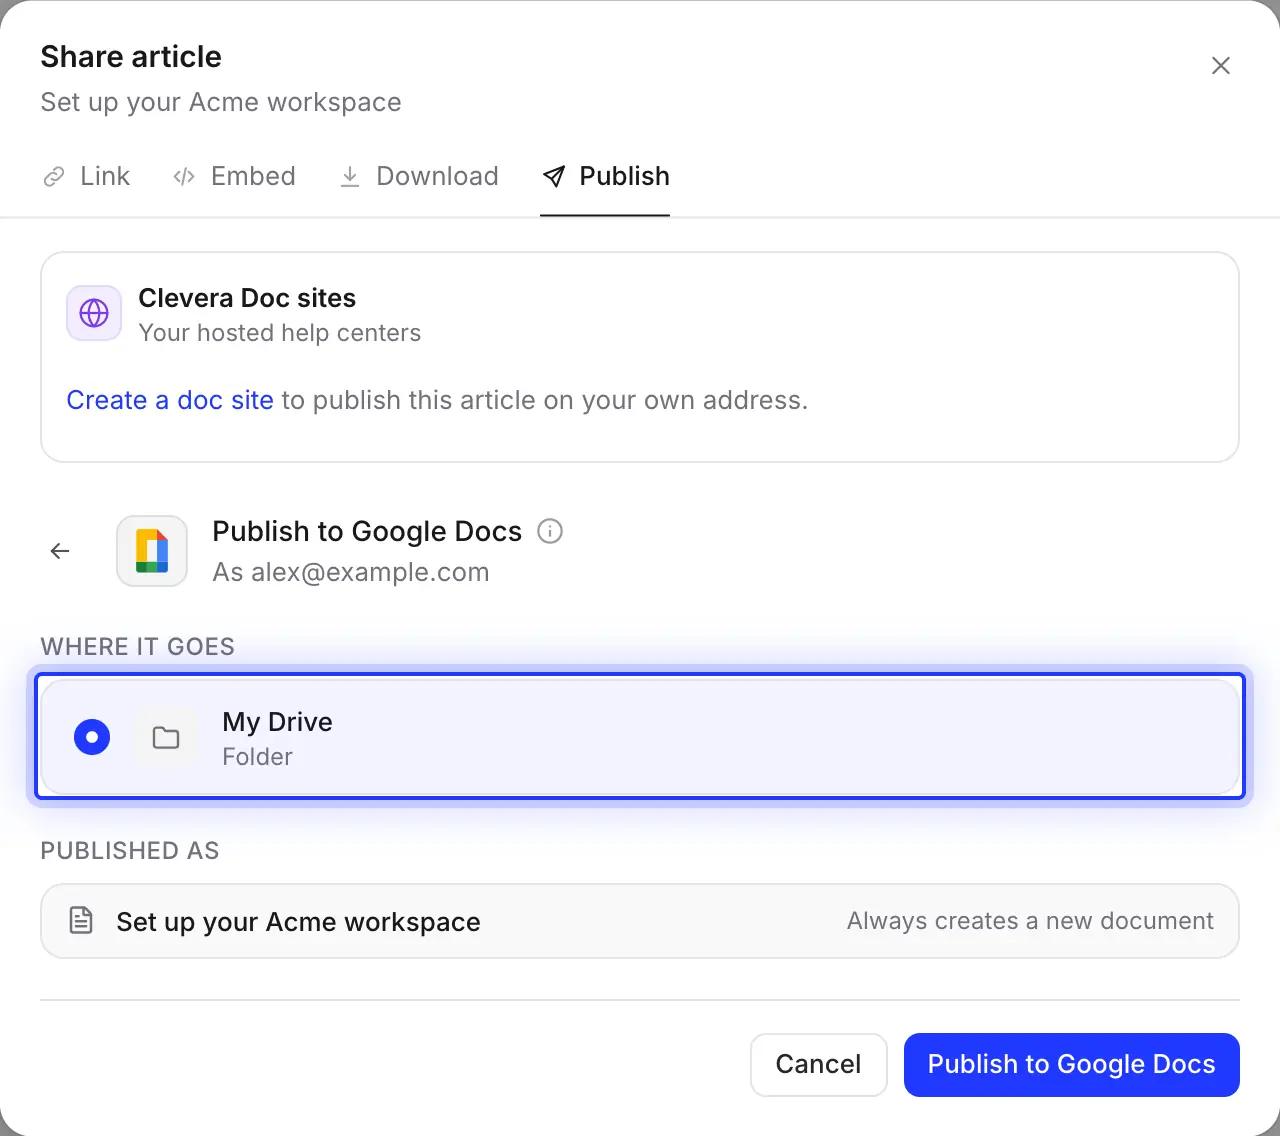
In the article’s Share window, open Publish, click Google Docs and then Publish to Google Docs. - 4
A new doc in My Drive
The document appears in My Drive, private to the connected account until you share it.
See it in Clevera
Publishing to Google Docs,
without copy and paste.
No more exporting a Word file, re-uploading screenshots one by one or fixing broken numbering. The article’s Share window creates the document for you.
One place, on purpose: My Drive
The only location listed is My Drive. That’s deliberate: to show you your folders, Clevera would need permission to see your other files, and it doesn’t ask for that.
Once the document is there, move it into a shared folder or a shared drive from Google Drive, and it picks up that folder’s sharing like any other doc.
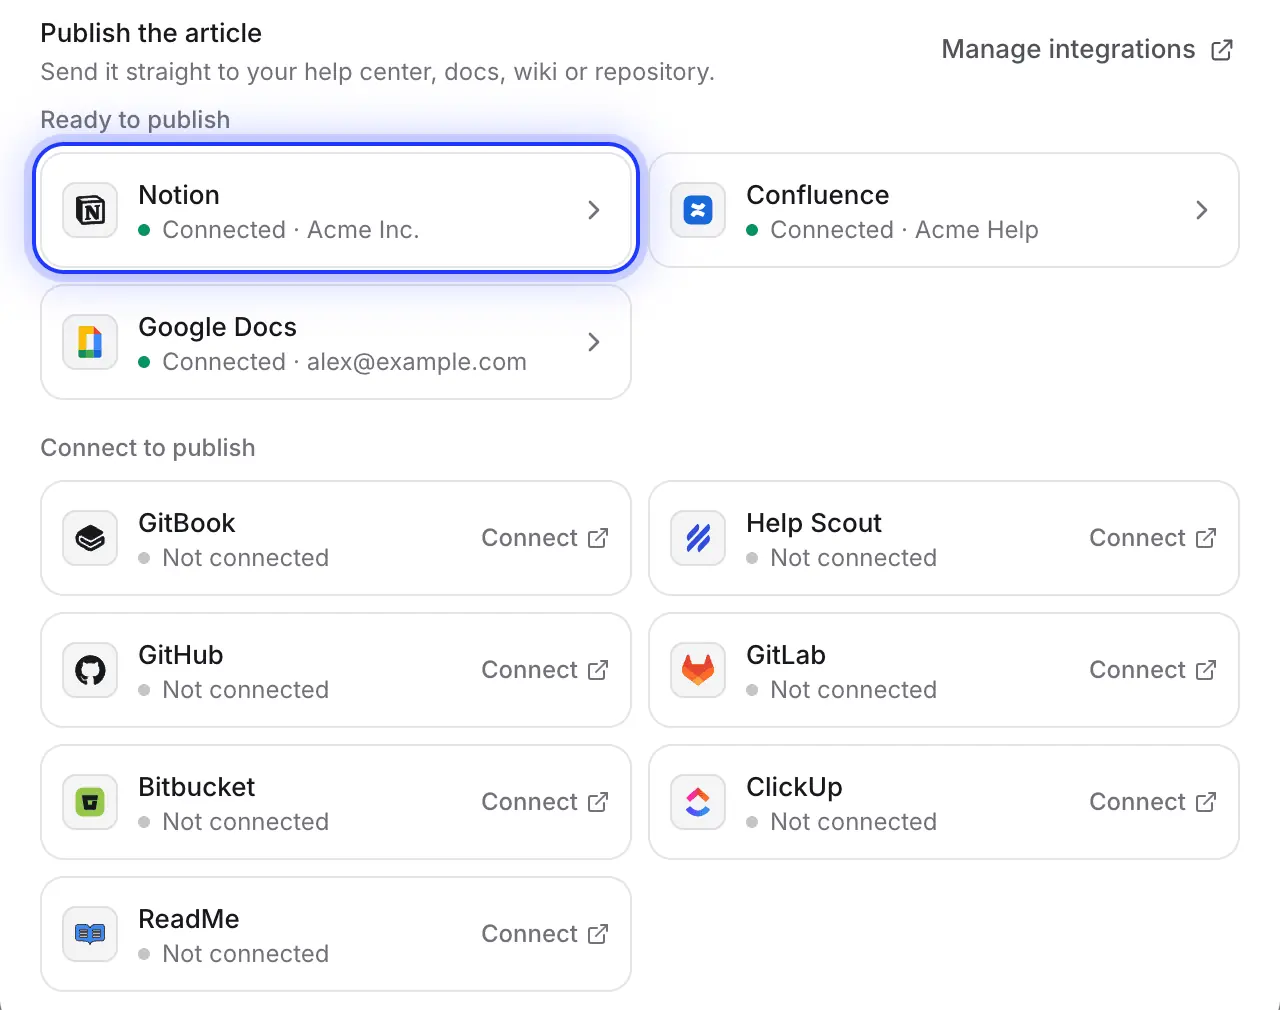
Ready next to the rest of your tools
Google Docs sits in the same Publish tab as Notion, Confluence, GitBook, Help Scout, ReadMe, ClickUp and the Git hosts. Publish the same article to a Doc for review and to your help center for customers.
When the document is ready you see “Published to Google Docs.” and an Open in Google Docs button. You can close the window while it works; a notification tells you when it’s done.
Filled in for you
What ends up in the document
and how it’s formatted.
Clevera converts the article into native Google Docs formatting, not pasted HTML, so styles, the outline and the document’s table of contents work as you’d expect.
- Document nameSet for you
- The article’s title. “Request time off in the HR portal” becomes a Google Doc with exactly that name.
- LocationSet for you
- My Drive of the Google account that connected Clevera, even when a teammate clicks Publish. Connect a shared team account if several people publish.
- Headings and textConverted for you
- Headings use Google’s Heading 1–6 styles, so the document outline fills itself. Bold, italic, underline, strikethrough, highlights and links are kept.
- Steps and listsConverted for you
- Numbered steps become a numbered list with each step’s title in bold and its detail indented under it. Bulleted lists, checklists and tables with a bold header row come across too.
- Callouts and codeConverted for you
- Callouts become shaded, bordered paragraphs with an icon and their title in bold, such as ⚠️ for warnings and 💡 for tips. Code blocks become shaded
Courier Newparagraphs. - ScreenshotsSet for you
- Copied into the document with their caption in italics, keeping their alignment and width (400 pt wide by default). Google accepts PNG, JPEG and GIF.
- VideosSet for you
- Google Docs can’t play video, so a video placed in the article becomes a ▶️ link with its title. The video the article came from isn’t added.
- SharingYou decide
- The new document is private to the connected account. Share it, move it to a shared drive or turn on commenting from Google Drive, as you would any other doc.
Setup
Set up the Google Docs integration
in about a minute.
You need a Clevera workspace on Pro or above. The workspace owner or an Administrator connects Google once; after that, anyone who can edit an article can publish it. Publishing uses no credits.
- 1
Open Integrations
In Clevera, click your workspace name, choose Integrations, find Google Docs and click Connect. - 2
Pick the Google account
Choose the account whose My Drive should hold the documents. A shared team account keeps everything in one place. - 3
Allow access
Google asks to let Clevera see, edit, create and delete only the files you use with this app, plus your email address and name. Click Continue. - 4
Publish an article
In the editor, click Share, open Publish, click the Google Docs tile and click Publish to Google Docs. - 5
Open and share it
Click Open in Google Docs, then share the document or move it into a team folder.
Google Docs integration questions
No. Clevera can only create documents, so every publish makes a new Google Doc and Clevera never asks about an existing one. After you edit the article, publish again and delete or rename the older copy in Drive. Edits made in Google Docs never come back to Clevera. If you need one page that updates in place, use Notion or Confluence.
Not from Clevera. Listing your folders would mean asking for access to your other files, so documents always land in My Drive. Move them into any folder or shared drive afterwards; Google keeps the images and formatting.
No. Clevera asks for Google’s narrowest Drive permission: it can only open the files it created. It also sees the connected account’s email address, name and picture, which it shows on the connection.
Yes, with personal and Google Workspace accounts. If your company’s Google admin restricts third-party apps, they may need to allow Clevera before you can connect.
Documents go into the My Drive of the account that connected Google Docs, whoever clicks Publish. Share them from that account, or reconnect with a shared team account.
Screenshots are copied into the document, so they keep working without Clevera. Videos placed in the article become ▶️ links; a Clevera video is included only when its share link is on.
Publishing to Google Docs is part of the Pro and Custom plans, and publishing uses no credits. Making the article itself uses credits as usual. See pricing. On any plan you can also download the article as a Word file and open it in Google Docs yourself.
Your next SOP, already in Drive.
Record the process once. Clevera writes the guide and creates the Google Doc, screenshots and all.